Fixipixi

Best Product Photographer in United Kingdom

Guidelines regarding photography

During covid 19-period e-commerce sector is growing rapidly. Because people are not feeling safe outside. In this regard, peoples are want to buy their desire product online. Some statistics show if your e-commerce product looks well then it will help to increase your convention rate up to 50%.

However, come to the main point. The United Kingdom is famous for its best photography. It has the most imaginative and creative photographers. This article has a collection of some of the best product photographers who have made headlines in the United Kingdom. Continue reading for more information.
How to build Photography Studio

Best Product Photographer in UK

Whenever you think of marketing your product, what comes to mind is how to get the best photographer. However. It can be a daunting task if you are green on the same. Worry not because below, we have a list of the best Product photographer UK to give your product the best advertisement. However we are a photo editing company, so we will provide clipping path service in the UK.

  1. Ben Nichols

Ben is one of the prolific product photographers in the United Kingdom. He is famous for his stage images at he presents that are very creative. Ben Nichols is unmatched when it comes to both promotional advertising photography as well as creative product photography.

He displays a lot of flexibility because he can comfortably take his photos anywhere, starting from his home studio or at a particular location. With the help of his sophisticated eye, Ben Nichols creates ideal lighting as well as a backdrop.

  1. George Fairbairn

The award-winning photographer who is well known for his portraits that are story-telling is George Fairbairn. However, he is best known for capturing editorial and advertising portrait photographs.

Moreover, this famous photographer can shoot advertising campaigns. Therefore, he cannot be left behind when capturing celebrity photos, musicians, and bands all meant for commercial and promotional purposes.

  1. Karl Taylor

Our third on the list is non-other than Karl Taylor. Karl is one of the famous photographers, and he does his job professionally. He boasts more than 20 years of service in the industry, with his work getting international accolades. Initially, he was a photojournalist and later grew his career to become a professional commercial photographer.

Apart from being a photographer, Karl Taylor also boasts as a photography instructor. He offers his clients training them on all photography courses. So you don’t need to worry even if you an amateur, he offers professional training courses to beginner photography courses.

His experience makes his creative work get internationally published. Consequently, you are likely to see his training being filmed at different locations that are inspirational due to stellar images.

  1. Rankin

John Rankin comes on this list because he is the most prolific fashion photographer that lives today. He gained his reputation because he has worked with the most beautiful models. He is also well known to have offered his services to influential brands in world history.

His imaginative and creative work cemented his reputation in the fashion industry. If you intend to follow Rankin’s footsteps in photography, ensure you follow him keenly and keep a record of progress.
Photography Jewelry

  1. Nick Knight

In the field of fashion photography, Nick Knight comes in as the most influential personnel. His craft produces provocative portraits which almost outclassed fashion photography. Moreover, he has had three decades to bettering his craft in fashion photography.

On the other hand, Nick Night is well known because he has done professional collaborations and networking. In addition, he has worked with other reputable photographers like John Galliano and Alexander.

  1. David Bailey

As early as the 1960s, David Bailey was shooting for Vogue issues. After that, he has transformed himself tremendously to become an icon of UK photography. His stark style in photography that he mixes with contrasted lighting makes an outstanding UK fashion photographer.

He injects the counter-culture elements to make fashion photography more enjoyable. He is a celebrated photographer because his art carries a message apart from converting traffic.

  1. David Hockney

Apart from flourishing in the paintings, David Hockney cannot fail to be on our list as Britain’s best photographer. You associate yourself with him, and you get recognized instantly. This is because he takes the same picture many times and pastes them over the other to form a three-dimensional effect.

  1. Oliver Charles

His exceptional sense of self-portraiture made him one of the best UK photographers. He evokes harmony and fragility in the kind of shots that he takes. His craft incorporates a surreal element and digital enhancements. He is one man to watch because he rose through the ranks and has become a frontrunner in the industry in just 19 years.

  1. Lord Snowdon

Snowdon did spend many years as The Sunday Times magazine editor. He is now one of the best photographers whose reputation has grown tremendously. His pictures were presented in a career retrospective that was held in 2001, and he was honored. He is among the first photojournalism photographers and he can never go unnoticed.

  1. Andy Goldsworthy

This man’s photography work takes inspiration from nature. And’s work uses natural lighting and has fewer digital enhancements. His shots are entwined with the sculptures and unify the two pieces by combining them. Many know him because he takes commission work to increase the variety of his project.

  1. Linda Wisdom

The current street photography cannot be itself if Linda Wisdom’s name does not appear. She has risen through the ranks because she turns her camera to multiple corners of the city. The Cs mantra-content, which has the critical timing and composition, has attracted many aspiring to be great photographers.

Conclusion

Our article has highlighted some of the best product photographers that are celebrated in the UK. All these are capable of increasing your product’s conversion rates which eventually leads to higher earnings.

Whenever you are looking for photo editing UK services from a professional photographer, ensure you examine your individual needs to hire the best. Get the best shots of your products and entice your prospective customers with stellar pictures from your best photographer UK.


Pixelz.com Service and Website Review

If you need to take your eCommerce game to a higher notch, then you need to have the best photography skills. Why photography? You may wonder. This is because there is a need to display the images of your products online for potential clients to view and make a purchase decision. In order to attract customers, the images must be attractive and this is where a photo retouching comes in.

But because there are several photo editing companies, you may not know which one is the most appropriate for you. Therefore this article reviews one of the most common and convenient websites for all your photography needs; Pixelz.

Pixelz was first founded in Denmark by three Danish entrepreneurs who sought to make easy the process of photo production. In addition to this, they saw the need of using this platform to improve the ecommerce situation whereby people would trade online successfully using product images.

Additionally, it operates in a lot of countries including Brazil, Germany, Denmark, Spain, France, Italy, Netherlands, Norway and the United States among others.

How does Pixelz operate?

To have a competitive advantage over other online photography agencies, this particular website uses a flow retouching kind of system to improve its quality of output.

The main advantage of this technique is its ability to get your photos online faster. For example, the turnaround times are as fast as 10 minutes. Also, the granular deadlines sync to your operations. It ensures that there are continuous delivery 24 hours a day.

At no point will you have batch movement of items, instead work in progress reduces by moving a piece immediately until it is done. Simply shoot an image, upload the photo to Pixelz and repeat the same procedure over and over.

As you are shooting another image, professionals back at Pixelz are already retouching the photos you uploaded. It then becomes a continuous process and you can see there no jamming occurs.

The best tools for uploading photos on this website are software integration, FTP, API, and finally, the web provided it is continuous.

Moreover, it offers you 4 editing plans for you to choose from;

  • Solo editing plan

If you are new to the eCommerce world and do not know where to start from, this is the best plan for you. It offers a turnaround of 48 hours and you only need to pay a subscription of $9 each month. The cost for a single photo is $1.45.

It provides services such as editing backgrounds to remove any imperfect studio backdrop. Also, it allows for cropping, aligning images and setting margins to give you a smooth experience. You can get multiple outputs using a single photo. It can also help you to come out with an invisible mannequin for the purposes of your businesses.

  • Professional editing plan

For those having busy eCommerce stores and want to boost their sales, you will need this editing plan. You will subscribe at a cost of $89 monthly and pay a lower price of $0.95 per photo.

By the next morning after uploading, you will have your photos ready. It offers you multiple retouching options for you to choose from, thus a touch of the profession. Quality is a priority for this plan.

  • Enterprise plan

Large companies and retailers get to enjoy the enterprise plan because their businesses are large. This package is quite hefty because it delivers results in 3 hours’ time, hence very timely. There is also full-time customer support and personal manager service.

Further, transparency is key because of the Service Level Agreement that ensures deadlines are met when need be. However, its monthly subscription is quite on high as you have to pay as much as $8,000 monthly. Finally, you can customize retouching, delivery times and your workflow as well.

  1. API plan

This plan does not entirely deal with photo editing and retouching but focuses on ensuring resellers’, market places and mobile apps have an excellent workflow. You can use this to integrate the marketplace so as to maximize sales. Nevertheless, there is no actual cost for this plan unless you get to contact customer service.

Image editing services offered by Pixelz

  • Color matching

The colors on your photos will be consistent and this reduces the returns with accurate colors.

It allows you to use image files for text wrapping, print media, and the web or background removal.

  • Shadows create

You can easily get rid of the background of your photo and instead add shadow. Applying drop, natural or reflection shadows will add subtle depth that improves the general outlook of your product.

  • Background removal

There is a need to edit the background in any photograph to make it look appealing, whether it is the cut-outs, knock-outs, silhouettes or etches.

  • Retouching

To make your photo appear professional enough, there is the need to smooth creases, reduce wrinkles, remove props, and improve shape and symmetry and getting rid of blemishes.

Benefits of using Pixelz for e-commerce purposes

For the purposes of running your ecommerce business, you obviously need to use this or other websites to make your product images be appealing to customers or willing buyers. But what makes this website stand out?

  • It offers email support at all times. Whenever you have an issue, you can simply send them an email and you will receive a prompt response.
  • There is a self-service platform that allows you to access the services as they come.
  • It gives you four editing plans to choose from, whether you are a pro, intermediate, beginner, or a large retail business.
  • It saves time because it uses a flow system that ensures you get your edited photos within the shortest time possible, usually between 3 and 24 hours.
  • It focuses on professionalism, thus if you need to get your small business up and running faster this will sort you out.

Comparison between Pixelz and Fix the Photo Websites

Both Pixelz and Fix the Photo are photography websites that help to improve on our ecommerce activities. You may find people confusing the two a lot but it is important to note that the two are different and we will identify some of these differences below. This is just to help you know which one to use and when.

  • Price

In terms of pricing, Pixelz is more expensive than FixthePhoto. This is due to the fact that they still charge you for a single photo alongside the subscription you pay monthly so as to have access to each plan.

On the other hand, Fix the photo is friendlier when it comes to pricing because there is no monthly subscription. They only charge you per photograph, the highest being $30.

  • Services offered

The services both give can easily be confused because they are similar but Pixelz offers services that exclusively deal with ecommerce while Fix the Photo can edit your wedding and baby photos in addition to the ecommerce activities.

Conclusion

Editing and retouching your photos be it for business or personal purposes is essential as it improves their look. Using the best online photo agency such as Pixelz is commendable because it is very fast and offers quick delivery. Besides, it gives you an option of 4 plans to choose from.

What is SRGB and Why SRGB Importance in Ecommerce

Nowadays eCommerce industry grows rapidly. Because covid 19 change all saturation, people want to stay home and most of the offices are now working from home. In this regard in 2020-2021 e-commerce industry is growing. During the covid 19 in Bangladesh and other counties have lockdown for 1-5 months. At this time e-commerce is help us for the people, and daraz, evaly offers lots of offers to buy the product from home. However, it’s not our main point. Our main point is what is SRGB and why it’s important for e-commerce, so come to the main point.

But e-commerce does not function alone. There is a need for an SRGB. But what is this? With eCommerce, you need to put up images of some of the products you plan on selling so as to attract buyers or rather customers. SRGB helps to create these perfect images for you. This article comes in handy to explain SRGB and its importance in ecommerce.

What is SRGB?

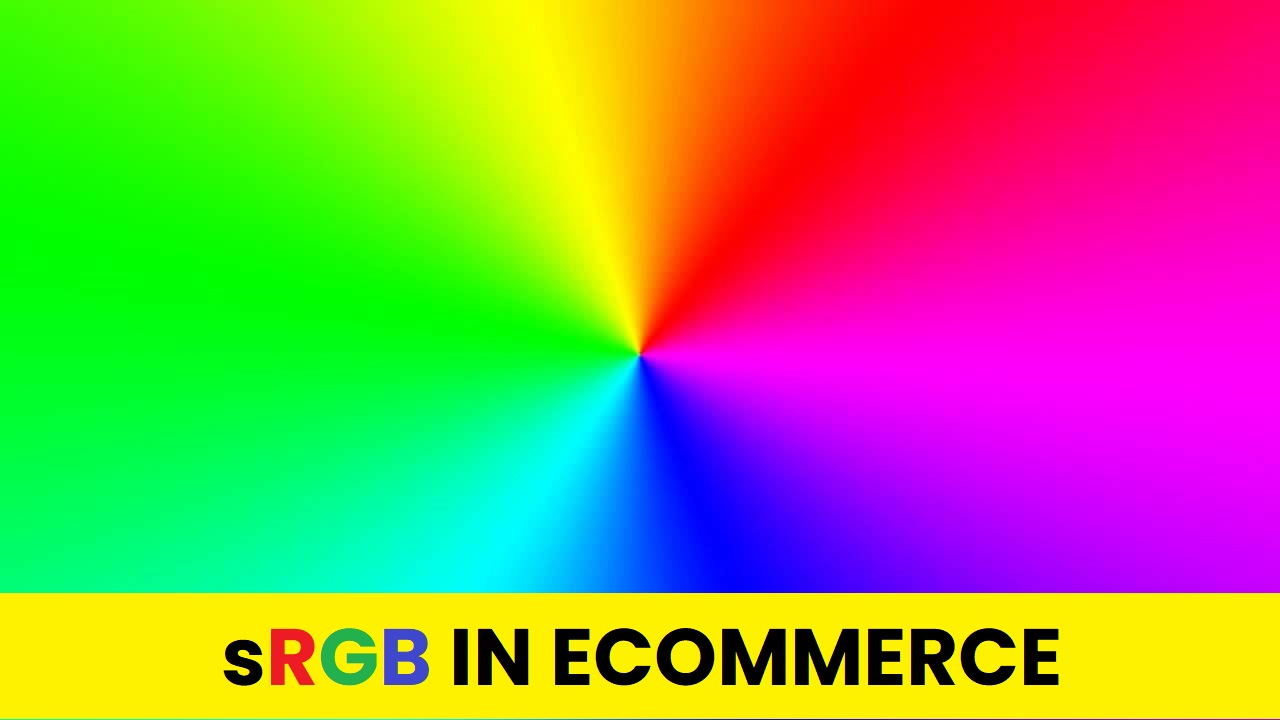
First and foremost, SRGB is a color space or model which mostly bases on three colors including red, green, and blue. It stands for Standard Red Green Blue. To create more variations of colors, there is a need to combine the three colors and this is where the SRGB aspect comes in. This helps to create clear images on your website. Besides, Standard Red Green Blue enhances the general outlook of your images.

Since 1996 when it was first created, the SRGB color profile continues to play a big role in the eCommerce business. Whether you are using a printer, monitor, or the web, you will definitely have access to it. Photographers need to have a fantastic color space for them to shoot impressive photographs and this is where SRGB comes in.

Notably, Standard Red Green Blue focuses on consistency and this is a big plus for photographers because what they shoot is automatically what will appear online. This is the reason why this color space is popular, unlike others. Everyone loves consistency and that is for sure.

Do you know that SRGB is the default color space all over the world? Yes it is despite there being other color spaces like RGB and Adobe RGB. Why is this though? Most applications, devices and even browsers are created to support SRGB automatically. So whether you save your images in any other format, the device you use will treat them as SRGB.

Benefits of using SRGB in ecommerce

For eCommerce purposes, businesses need to come up with posters or simple images to advertise their products or attract potential buyers. SRGB is the master when it comes to creating excellent posters. When you process these images in this color space, you will not only get accurate colors in every device you use but also very simplified workflow.

So as to get your images in the SRGB mode, there are two methods you can use to achieve this; you can either adjust the color space on your camera to SRGB or you can shoot the images in Adobe RGB mode then when you will be processing them you convert into SRGB.

Additionally, this mode gives out vibrant images that are more saturated and their clarity enhanced. Such images will definitely attract more buyers. Combining this color space with white balance guarantees that customers get the product they paid for without having to return. By this, your sales increase and your customers get to trust you more and can even refer other clients to you.

You can now tell that without the SRGB color space there might be inconsistencies with your product images. This may lead to customers returning products because they look different in a real sense in comparison to what was displayed online. Thus, utilizing SRGB in eCommerce is not even debatable; it is a must if you want to improve your sales.

SRGB vs. Adobe RGB

This article mentions Adobe RGB several times and it is best if you get to know what it is to avoid any confusion. Just like the SRGB, this is also a type of color space that allows photographers to take clear shots of images for eCommerce intentions.

Therefore Adobe RGB is a color space that presents a wider variety of colors as you will notice in sample pictures below because of its 30% larger gamut. You will hardly notice a difference between the two but they are not similar. RGB has more colors and presents wider vibrancy than the other mode.

For best results, you need to shoot your images in RGB mode then later convert to SRGB because the clarity and vibrancy of the images will not be lost. The fact that RGB has a wider range of colors does not make it the best. Most monitors and other devices can only display SRGB so if you use RGB on these monitors most of its colors will not be visible.

If your focus is on color capturing then you might consider Adobe RGB because it is able to accommodate 50% of visible colors while the other can manage only 35%. Yet again if you are out to achieve consistency, then SRGB does not disappoint.

Once you shoot on RGB the images will be very much clear but the moment you start uploading, this might change because of automatic color conversion leading to dull images.

Moreover, when you are dealing with professional prints Adobe RGB is the sure deal. Also, for 16-bit images, you will have to use this because of the wide range of colors. The best thing about RGB is that you convert images easily into the SRGB mode. Never upload images in RGB mode because they will appear dull.

Conclusion

All in all, SRGB is the mother of all color spaces because of simplified workflows as it saves time. Using SRGB for your eCommerce platform ensures that the clients get exactly what they ordered. Most websites are synced with SRGB color space thereby making the product images appear attractive thus maximizing sales.

FixthePhoto Website Review

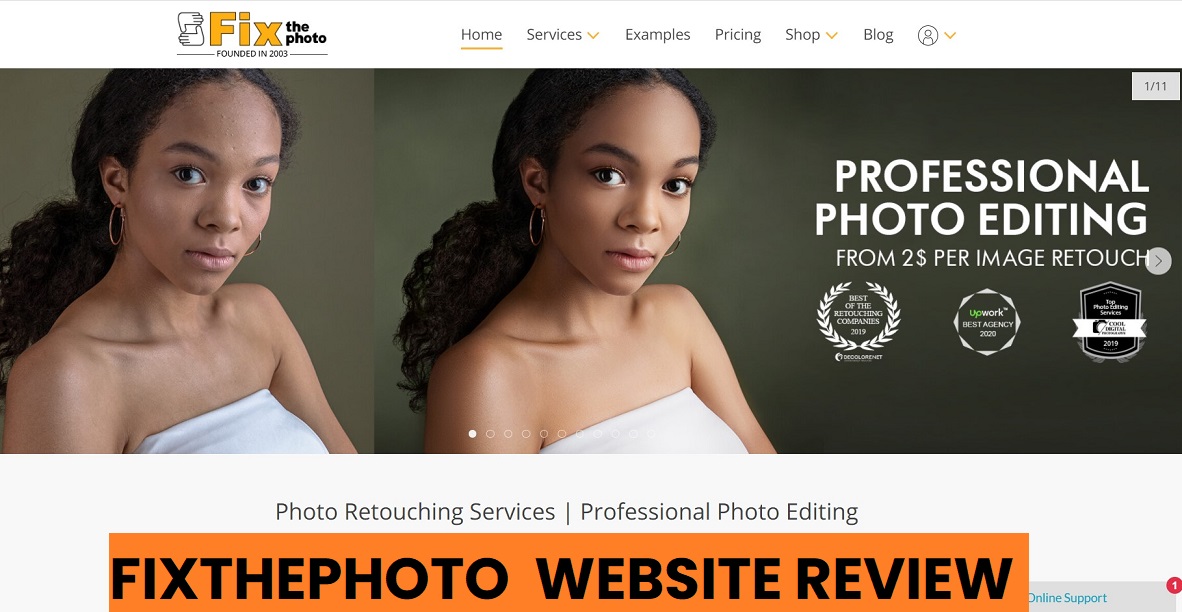
Photographs create a lot of memories and that is why many people enjoy taking photographs of themselves and others. Today, there are software or photo editing companies that you can use to make your images appear even better. For those who are into professional photography, such sites come in handy to help with image editing. One of such websites is Fix the Photo. This website offers many services relating to photography and we will discuss them below.

Fix the Photo has been in existence since 2003 and mainly deals with the retouching of photos. It employs the services of over 90 experienced photo retouches’ and has its presence in about 70 countries. Other than this, it boasts of over 2 million completed orders and 10 million successfully edited photos. All these put together, make it the most trusted online photography agency.

Additionally, their main mission is to ensure that clients get a secure, affordable, fast, and excellent quality photo retouching experience, whether they are beginners or professional photographers.

Evolution of Fix the Photo Website

Since 2003, the website has been offering a variety of services to its client, the very first one being portrait retouching services. Here, the retouchers were able to edit family photos, headshots and couple and baby photos as well. Note that at no point will the website use your photos without your permission.

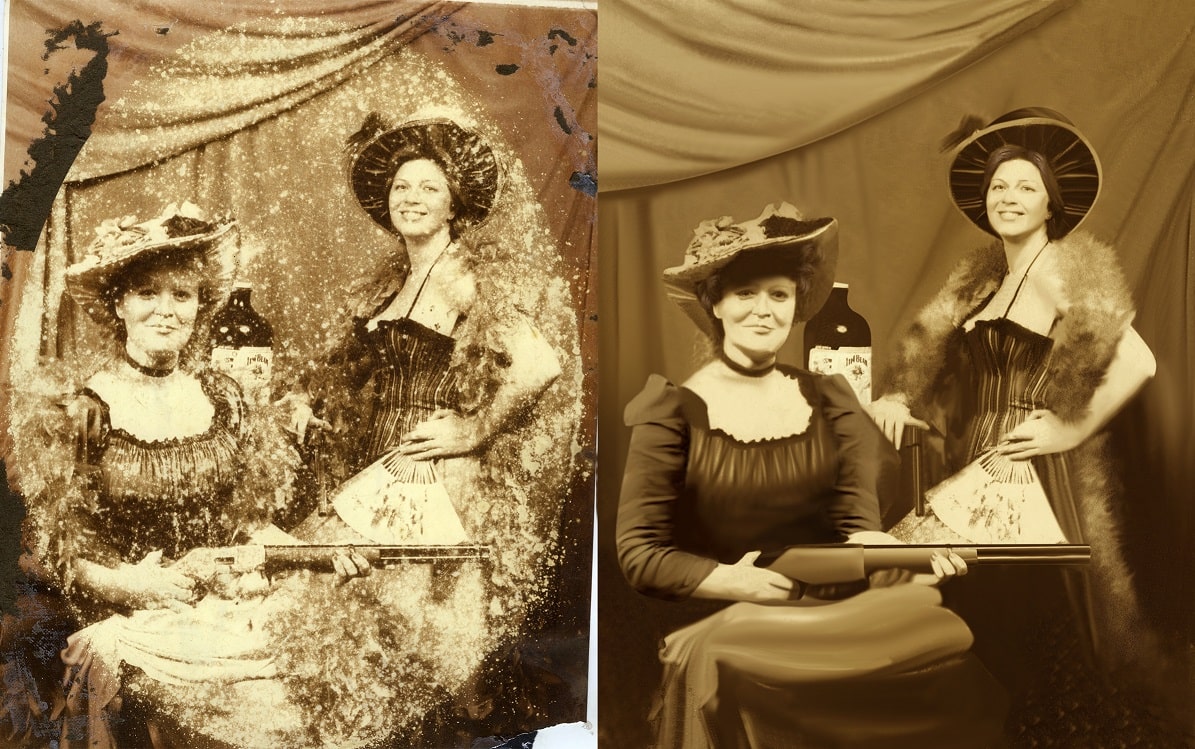
In 2009, the website delved into another activity; old photo retouching restoration services. This basically involves restoring old images that have been destroyed by water or fire.

All the client needs to do is scan them an original damaged photo then the retouchers will employ Photoshop in order to edit those old images and finally print them afterward.

Lightroom photo editing services were introduced in 2011. If you need to perform bulk photo editing then this website got you covered for either a beginner or a professional. The package includes color correction, culling of images and artistic photo editing.

In 2015, the focus shifted to eCommerce so as to help online retailers with their images. The product photo retouching & clipping path Photoshop service helps with this.

By 2016, you were able to get photo manipulation services from this website. Photo manipulation involves creating surreal photos, cartoons or sketches in a realistic manner when a photographer is not able to edit some of the photos. Hence, it brings together real photos that bring out outcomes that are not real.

The year 2017 made it possible for clients to download both free and premium tools that will be useful in photo retouching. They include; brushes, overlays, textures, Photoshop actions and lightroom presets among others. Usually, they are simple to use regardless of whether you are a pro or a newbie.

Fast forward to 2020, the website now offers video tutorials and articles to those interested in photo retouching. Beginners, intermediate and pro photographers are able to receive thorough training via these articles.

Benefits of using Fix the Photo website

You may be wondering why this website only. There are many advantages of using it to master your photoshopping and retouching skills. Notably, it is not limited for use in any country as it is an online service. Starting from USA which is the main business area to Canada, China, Brazil, Europe, Australia, New Zealand, Japan and UK just to mention a few.

Besides, it is quite affordable in that you find that most charges per service do not exceed $5 thus convenient for many users. Further, it is very easy to use. Once you upload the photos to this website and indicate your requirements alongside it, every other thing is sorted out. You just wait for the results.

In addition to this, there is a 100% security guarantee. This means that your images are safe from online predators and will not be uploaded unless you permit them to. Also, they offer 24-hour service meaning that at no point will you miss out on their services.

Services Offered

The main service clients get here is photo editing. And under photo editing there are other small services that we list below together with their pricing;

  • Portrait photo editing

At only $5 per photo, you can access this service. Your portrait photo will undergo skin smoothing to get rid of any blemishes, removal of stray hair, color adjustment, correction of make-up, and body shape enhancement.

  • Wedding photo editing

Your wedding photos can be edited professionally to look more enticing by enhancing the background, fixing lighting problems, airbrushing, retouching of skin texture, smoothing out cloth wrinkles and adjusting colors. This will cost you $0.20 for each photograph.

  • Body editing

If you are not satisfied with how your body looks in a photo, then you can edit it to fit exactly what you want. There is the removal of cellulite, breast enlargement, slimming body curves, airbrushing, and enhancing your background among others at only $5 per image.

Photos of your newborn will be highly improved by enhancing color, body retouching, enhancing skin tone, editing of the background, and removal of unnecessary props at a price of $5 per photo.

How does Fix the Photo website work?

There are no long processes to follow when using this website unlike others we know of. You only need to focus on four main steps to achieve your goal of photo retouching or editing.

  1. Open an account with this website and upload the photos that need editing.
  2. Alongside each photo, write your requirements in detail. In other cases, you can even attach sample pictures.
  3. Receive the photos you had uploaded for editing.
  4. Check the photos to make sure they fit your requirement. You can either accept or reject based on your findings.

It is that simple!

Conclusion

Professional photo editing has become a common phenomenon in recent times and no one wants to be left behind. It does not matter whether you are a pro or a beginner, Fix the Photo website ensures you get the best services of photo retouching and editing.

Best Compact 35mm Film Camera

6 Best Compact 35mm Film Cameras

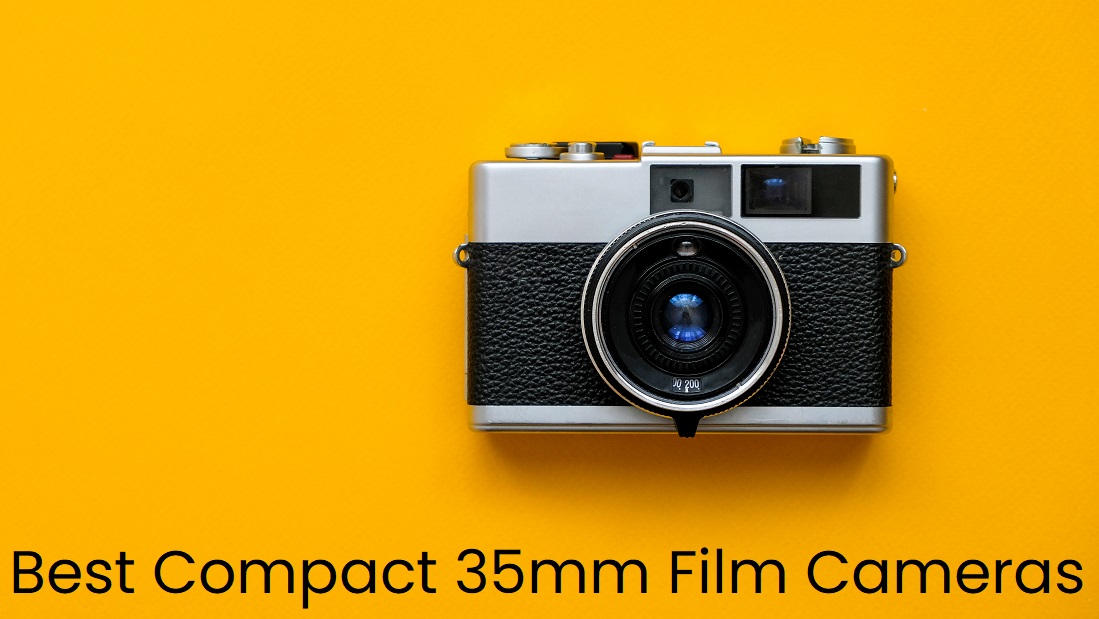
Pictures are beautiful because they create memories. And how do we achieve these wonderful memories? Simple! Cameras capture good quality pictures from wherever you are. You can find cameras in your android and iOS phones, tablets and laptops. However, they are not really perfect in comparison to the best compact 35mm film cameras. With these cameras, you get excellent images there and then, whether on a trip or at a party somewhere. Moreover, they are usually light in weight and compact to fit in your handbag or even trouser pockets. All you need to do is point and shoot, thus easy to use.

Why do people choose the 35mm film camera nowadays?

Despite the fact that there are many brands and types of cameras available in the market, many people prefer the 35mm film cameras recently. Why? This is what we seek to find out. First of all, this is not a digital camera; it is a film camera just as the name goes therefore it has existed for a long time, hence traditional. It is very easy to use and does not require any intensive training whatsoever. You do not spend a lot of time editing pictures because of slight adjustments, unlike the digital cameras which need you to pay keen attention to detail whenever you are editing.

35mm film camera nowadays

Additionally, this film camera gives you the ability to pay more attention to your shooting skills so as to deliver super quality images. The important thing here is to focus on the light if you are looking for quality. The other reason why people choose the 35mm film camera is simply because it offers a variety of colors to choose from. So, whatever your preference is, you will not miss out on your favorite color. Whether you want dull or bright pictures or anything in between that, this camera will sort you out.

Using a film camera gives you a lot of experience because there are skills that you must learn so as to be perfect at it. Digital cameras will not expose you to such skills because they are very straightforward. You are able to learn how the camera produces an image by familiarizing yourself with the speed of the shutter, metering, and aperture among others. Further, it is interesting to experience the development of images by the film camera in a dark room. It is just a magical feeling that no one wants to miss. With all these reasons, who will disagree that film cameras are still precious assets?

6 Best Compact 35mm Film Cameras


  • Canon AE-1 35mm Film Camera w/ 50mm 1:1.8 Lens (Renewed)

The Canon AE-1 was first produced in 1976 and still famous to date. It is famous for helping one to learn and understand the basics of film photography. The AE-1 simply means Auto Exposure 1. It has a simple design and features a black and silver exterior while others may be completely black.

Canon AE-1 35mm Film Camera

Product Details

This camera measures 141mm by 87mm by 47mm and weighs about 2 pounds. To operate its shutter, you need a 4LR44 battery because it will not function without it. You can be able to check the level of the battery using a battery check button which sits beside the film plane indicator. Replace the battery if the meter needle reads above 5.6.

Similarly, it features dual-material construction; plastic and metal on its top plate. This ensures that it serves you a long time. Besides having a fast shutter speed, it also has lenses that are interchangeable. They include; Canon FD 55mm f/1.2 S.S.C, Canon FD 50mm f/1.8 S.C and Canon FD 50mm f/1.4 S.S.C.

In addition to this, its viewfinder has a 93.5% vertical field of view and horizontal image coverage of 96%. Nonetheless, it cannot perform multiple exposures. The best thing about this camera is its huge finder that is bigger than most popular film cameras. This enables it to produce big and brighter images.

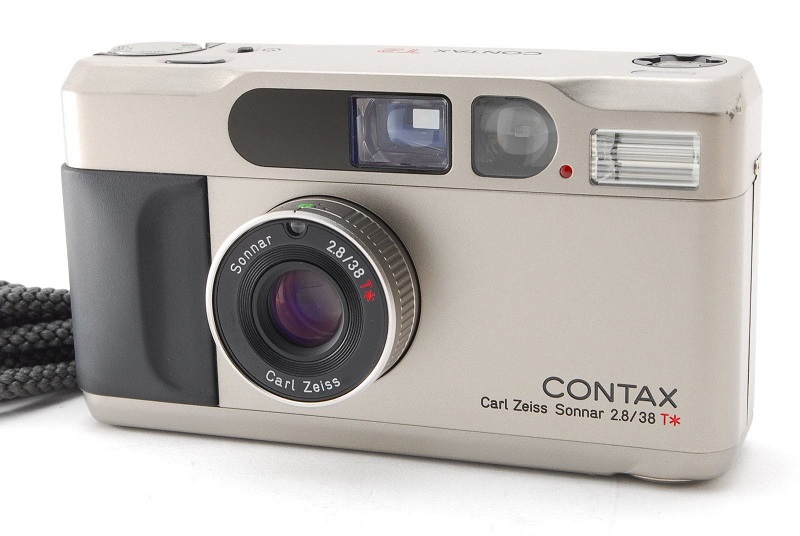
  • CONTAX T2 Point & Shoot 35mm Compact Film Camera (Japan)

If you are in need of vibrant and clear pictures, the CONTAX compact film camera does not disappoint. It features a 38mm f/2.8 Carl Zeiss T sonar lens which absolutely makes this possible. It is available in silver, titanium, jet black and gold finishes meaning you have a variety to choose from.

CONTAX T2 Point & Shoot 35mm Compact Film Camera

Product Details

The catchiest bit about this camera is its in-built flash that comes in handy whenever there is poor or no lighting. You can still get excellent quality images by using flash. Also, it allows you to choose from a variety of shooting modes and programming it manually based on your preference.

Furthermore, it can autofocus with the help of rapid shutter speeds so as to deliver clear images. There are no blurred images even when in motion. Besides, it is easy to use because all you need to do is click on a switch that brings out the lens and the camera is ready for action.

It comes with accessories such as a neck and wrist strap. Despite all these amazing features it has, it is expensive but worth it. The fact that you can manually control it and the presence of the Carl Zeiss Sonar lens makes it a superb camera.

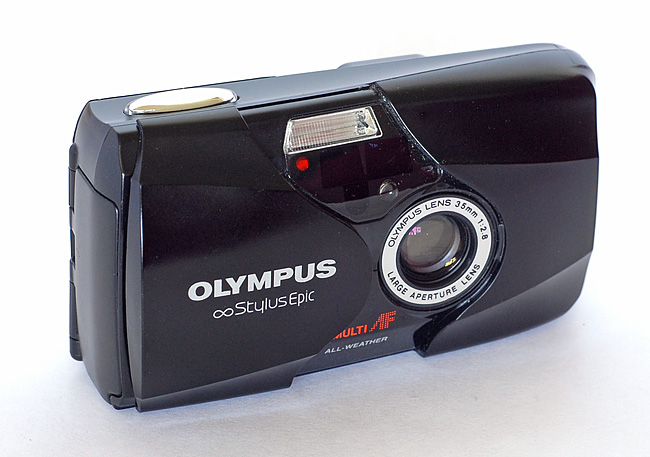
  • Olympus Stylus Epic DLX 35mm Point & Shoot Film Camera

With the Olympus stylus film camera, you are able to capture images that feature unmatched quality. Measuring 4.3 *2.3*1.5 inches, it is not only compact but also light weight in design. The unique thing about it is that you can use it anytime despite the weather conditions, thus convenient.

Olympus Stylus Epic DLX 35mm

Product Details

In addition to being a point and shoot camera, it features red-eye reduction that assists in bringing out clarity in pictures. Without a 1*3V lithium battery, this camera will not go off. It offers you a wide selection of colors to choose from which in turn improves on exposure accuracy.

Additionally, you can easily focus on an image not necessarily at the center of the frame using its auto focus feature that eases the process. Its 35mm f/2.8 lens is very sharp, beating the lenses of most cameras in this list.  You can easily capture images in areas where there is no lighting using the integrated auto-flash feature it comes with.

Nonetheless, it does not have manual functions which make operation quite difficult. It is best because of its ability to withstand weather conditions such as rainfall and snow. Notably, its lens is excellent and produces high clarity images.

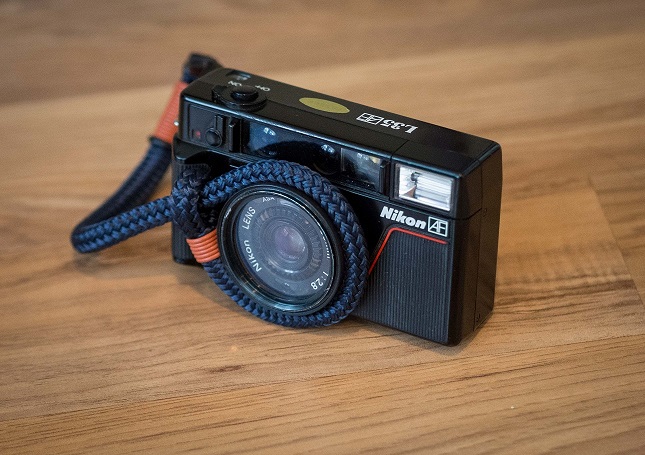
  • Nikon L35AF Camera

Putting its focus mainly on producing images that are of high clarity, the Nikon L35AF camera is a hot shot. Precision is a priority for this camera because the point and shoot feature allows you a finer focus of what you are trying to capture. This ensures that none of the images will be blurred.

Nikon L35AF Camera

Product Details

Its shutter is electronic. This means that it is able to click on your images faster than when using a manual shutter. Besides, there is a self-timer function that you can use to take pictures of yourself when no one is there to take snaps of you.

Similarly, it is easy to operate and also load film when need be. You do not need to control exposure as it will automatically do this for you. There is flash which means that your images will be brighter than normal and that is an added advantage altogether.

You can never go wrong with the clarity of its images because of its auto focus that is both fast and accurate. How can we forget the fact that it allows you to use real filters? This highly maximizes the image output. Its main downside is that the auto focus is a bit slower as compared to the rest of the cameras.

  • Yashica MF-1 Snapshot Art 35mm Film Camera Set (Prussian Blue)

Are you a street photographer who wants to achieve amazing photos with your camera? Look no further. The Yashica film camera specializes on excellent street photography among others. This is because of its focusing range of 1m to infinity. Also, it is small and compact in size and fits really comfortably in your hands.

Product Details

To begin with, it has a fast shutter speed of 1/120 seconds which contributes to high precision images. Its powerful Yashica MF-1 lens delivers a focal length of 31mm together with an aperture of f/11. The presence of a built-in flash ensures that it produces pictures that are of high quality even in the dark.

Furthermore, it comes with a 400 35mm negative film that makes it possible for street photographs. Moreover, its battery life is long enough to support about 120 times of flash and its flash life can handle 3000 times of flash. But the battery life is dependent on the battery you are using.

It is mostly made of plastic so there is need to be careful when handling it as plastic is largely fragile. If you need a camera that favors different skin tones then this is the best option.

  • Pentax Super Program 35mm SLR Film Camera with SMC Pentax-A 1:2 50mm Lens

The Pentax super program film camera is designed with students in mind. It is otherwise known as the student camera because it helps one to learn and understand all the basics pertaining to photography using film cameras. It measures 6.7 by 4.8 by 2.5 inches and has a weight of 1.75 pounds.

Product Details

This camera is compatible with any of the Pentax K-Mount lenses present in the market. You can control its exposure either manually or automatically which enhances its flexibility. It has a minimum shutter speed of 1/2000 seconds and its speed at maximum is 15/2000 seconds. With these kinds of great speeds, you will not have blurry photos whenever you are moving or capturing an object that is on the move.

The fact that it encompasses manual focus alone makes it a great camera for use by photography students. It has a sync speed of 1/60 seconds which makes sure that the flash works on a timely basis to produce excellent quality photos even when it is dark.

There is a depth of field preview that enables you to easily identify any sharp and blurred points in a photo. If you buy an old version of this camera then it will surely be a nuisance to you because of many broken and non-functioning parts.

Best Photography Schools in Europe

Professional Photo editing service in united kingdom

Venturing into photography as leisure or as a business is a common thing happening nowadays. Photography is a skill that you can either learn on your own by watching YouTube videos or look at what someone else is doing and grasp that or you can simply go and enroll in a photography school. It may surprise many that there are 7 best photography schools in Europe that focus wholly on training their students on different skills pertaining to photography.

One would wonder what they teach in a photography school. You may have a talent in photography but is not developed yet. The schools will help you develop this talent and even impact more skills that you did not know of. Here some of the most basic skills that you will find in any photography school with no doubt.

  • Photoshop

This is a very common skill that people use nowadays to get creative with pictures. It works by fixing photos which needs you to know how to smudge and airbrush. This makes your photos appear really attractive and people will pay a lot of money for photoshopped pictures. It is not easy to do this on your own therefore requiring you to enroll in a school.

  • Skillful photography

This mainly applies to professional photographers or journalists who need excellent quality output. Here you learn when it is the right time and moment to take a picture, not just anything random.

  • Guidelines regarding photography

Even photography just like any other discipline has rules that require you to follow in order to do right. The most common rule of photography is the ‘Rule of Thirds’ which basically focuses on placing the object you are capturing within the frame. There are also rules about viewpoint, background, depth and balancing elements among others.

Guidelines regarding photography

With the skills you garner from a photography school, you are able to pursue a career in journalism, media planning, video and film production and digital marketing besides being a professional photographer.

  • Photo Editing Concept

Like photography photo editing is an art. Every attractive image is edited by professional photo editors. So you have minimum editing concept, understand the color tone, contrast, saturation, etc. However, fixipixi is a digital photo editing company and we will provide photo editing services in UK and around the world.

Requirements to join Photography school in Europe

Europe has so many photography schools that you will even get confused in choosing the one that suits you best. No worries! This article zeros down to 7 of the best photography schools that will equip you with excellent skills to improve on your talent. You can either leave the school with a Certificate, degree, master’s of PHD in photography depending on your level of learning. All these will make you land a good job thereafter.

To enroll yourself in photography school does not require you any special qualifications. For as long as you are creative, have a good eye and have an idea about technical abilities, you are good to go. Other requirements include; 5 GSEs that include Mathematics and English and either 2 or 3 A levels and Art, media or design must be part of this.

Top 7 Best Photography Schools in Europe

Here is a list of the top 7 best photography schools in Europe that will help you to nurture your photography skills.

Best Photography Schools in Europe

  1. Vevey School of Photography, Switzerland

It is one of the best schools in Switzerland. The Vevey School is mainly divided into three faculties; vocational school apprentice program for beginners, applied-arts full-time program and school of professional maturity if you need to engage in professional photography. Notably, there are many other courses you can study apart from photography but in relation to the same.

  1. Royal College of Art, UK

This school offers the best photography courses in the whole of Great Britain. It has all the equipment and employs professionals so as to give you the best training. In most circumstances, you can easily get a job while you are still studying here. The main advantage is that you get to have your own personal tutor from the time you join.

  1. Koln International School of Design, Germany

It offers both practical and theoretical skills involving both design and photography. It focuses on cross-cultural cooperation because it accommodates many international students. There is a wide variety of photography courses for you to choose from.

  1. Speos Photography School

Whether in London or France, you can easily enroll in this photography school and gain the best skills. The tutors use both English and French for teaching. Some of the courses it offers are; sports photography, fashion and photojournalism just but to name a few.

  1. Academia Italiana, Italy

This school combines both photography and fashion design. To enhance the learning of the rich Italian culture, it admits students from all over the world. If you want a three-year degree program or a one-year professional course, be sure to get that here.

  1. Gerrit Rietveld Academie, Netherlands

The school’s headquarters is in Amsterdam. Not only does it offer photography courses but also gives its students an insight into the art of independence. You can start your photography sessions after school or while still in school.

  1. Rodchenko School of Photography and Multimedia, Russia

Do you know that this school allows Russia qualifying citizens to attend its classes for free? Now you know. It does not limit its courses to photography alone but also offers classes in documentary creation, sound and video art and sculpture among many. Once you finish your three-year program, you can display your work in the Multimedia Art Museum of Moscow.

Conclusion

Having gone through this article, you are now able to identify a school that suits your qualification and also depending on your location in Europe. You have the freedom to choose among a variety of photography courses that the top 7 best photography schools in Europe offer. To get extra information about the schools above, you can simply visit their websites.

The Best Photoshop Tutorials for Beginners

shoe photo editing service

Adobe Photoshop is one of the powerful and famous image editing software for photographers and designers. The software has both simple and advanced features that users can uses in editing. Learning how to use the software properly is not easier more, especially to beginners.

The photo editing software is usually updated at a given period. This is done to keep users updated with the current features and equip them with the new photo editing skills. The use of the best photoshop tutorials will help you learn how to use various software effectively.

Below are the top 10 Photoshop tutorials for beginners

  1. Photoshop CC 2018 full tutorial for beginners

This is one of the top free tutorials that overviews how Photoshop CC 2018 works. The tutorial teaches the users the basic toolbar, options information, and windows in photo editing. It also explains the essential skills that are used in Photoshop.

This is an excellent tutorial that gives a general overview of Adobe Photoshop. It also lays a solid foundation that will be ideal for advanced features. The tutorial takes 15 minutes, and hence it is short, and you can follow.

  1. Photoshop Refine Edge Tutorial

The refine edge tutorial for beginners was created by one of the top and favorite YouTube channel called ‘photos in Color.‘ The tutorial teaches the newbie how to place an object on a transparent background.

This is one of the top techniques that most software uses. This will help the beginners to have that technique. This technique is majorly used in advertisements and e-commerce.

  1. Quick Photoshop Manipulation tutorial for beginners

Do you need a quick and easy to follow Photoshop tutorial that is perfect for beginners? This is one of the top tutorials that equip learners with PA skills. The tutorial is ideal for all that you are looking for if you are new to Photoshop.

The tutorial illustrates the basic concepts of image editing details and quickly. It allows the learner to learn and master the photo editing necessary skills rapidly. There are more than 1 million viewers who have watched the tutorial hence showing how good it is.

  1. Get to know Photoshop.

This tutorial might not be significant to others, but it has a variety of videos that guide you on Photoshop’s basics. It provides text tutorials paired with videos on the step-by-step format you need to follow in Photoshop.

It has various tutorial topics on Photoshop basics like ‘change of image size,’ adjust the image quality, work with layers, background change, and so on. This tutorial is essential for all those who want to take their Photoshop to the next level.  It lays a good foundation for advanced Photoshop learning.

  1. Photoshop tutorial for beginners; the quick start Guide

This tutorial was first published in the mid of 2016, and it has been great in equipping beginners with Photoshop basics. It introduces Photoshop’s basics to beginners, but it also let them know the top 10 things that beginners need to know about Photoshop.

Honestly, this is one of the best tutorials if you do not know where to begin.  All the basics are done in step-by-step that are easy to follow.

  1. Beginner Photoshop Tutorial

This YouTube tutorial enables beginners to learn the top 10 significant easy image effects and various techniques to improve tour images. These techniques are vital for UI design beginners and photographers. Such skills include soft dreamy glow effect, light leak effect, white effects, and others.

The tutorial is perfect for you because it helps you to improve your PS skills in a short period. As a beginner, you will also know some tricks that you can use to get high-quality work on your image.

  1. Dispersion Effect Photoshop Tutorial

This tutorial isn’t as popular as the others, but it will help you learn how to create a dispersion effect. It will also help you to learn about the disintegration effect of Photoshop CC.

This knowledge will help you as a beginner; it is also easy to follow and spells the procedure you will follow.

  1. Blending Multiple Photos in Photoshop tutorial

The blending of multiple images on Photoshop is vital to all great photographers.  This Photoshop tutorial will equip you with the basic techniques of blending multiple images in Photoshop.

The tutorial was created in 2016, but it has been a great one for photographers who want to take their profession to the next level.

The tutorial features a step-by-step guide on how to blend modes successfully and layer masks. It also teaches the learner how to adjust layers and gradient maps on the images.

  1. Ten steps to getting started with 3D Photoshop tutorial

An excellent 3D effect is ideal in enhancing photo design, text, website, app, and others. As a beginner, you need to equip yourself with the skills to achieve it. In the tutorial, you will learn how to create the original 3D object and convert the existing graphics onto 3D objects.

These ten steps provide you with a great technique that will dramatically improve your photo design and website.

  1. Crop images in circle shape Photoshop Tutorial

Knowing how to crop your photos is vital. This Photoshop tutorial teaches you in a 5-minute video how to successfully crop images in a circle.

Over the years the tutorial has more than 1 million viewers; this shows how important the technique is.  So this is one of the top techniques that, as a beginner, you need to learn.

Final thought

There are so many Photoshop tutorials for beginners in the market. The tutorials aim to equip the learners with the basic skills that are required in Photoshop. We have highlighted the top Photoshop tutorials that can provide you with the skills necessary in Photoshop.

It is good to know that different tutorials provide different skills in Photoshop. The tutorials use various tools, and therefore when choosing your tutorial, it is good to know what your goal is and which tutorial will help you achieve it.

What is a square photoshop brush, and how to make it

What is a square photoshop brush

If you have never tried out various photoshop tools, then this article can be your great partner. Playing with photoshop tools is fun because it allows you to discover all your images differently, giving them varying shapes. If you are ready to do such experiments, this article should take you through the entire process. The article also contains some useful information concerning the square brush and top five square brushes I photoshop.

Besides, you will be able to know why these square photoshop brushes are important to you. Remember, this is something that you can do yourself; no need for seeking the expert’s help.

What is a square photoshop brush?

A square brush is special when it comes to Adobe Photoshop, useful for various photo editing services. These brushes are not only meant for professional photo editors but also amateurs can use them. I say so because they are not complicated; short-term training is enough to understand/know how to use it.

This brush comes in a square shape (the source of their ‘square’ name). They are very important in helping you to remove a specific part of an image squarely. This statement implies that you will reduce or erase an unnecessary portion of your image, giving it a new and unique look.

Remember, this brush is not limited to only squaring the photo; you can still use it on other shapes. Square brushes are special tools that experts often use to create multiple new effects on an image. It is evident that the advanced photoshop version comes with 24 brushes set.

The most interesting part of each brush is that their respective shape and number introduce them. They also have distinguished purposes; they have a different mission to accomplish. Therefore, to determine which one is bigger and smaller, the answer will be number 24 and 1. The 24square brush is the biggest with a mammoth size.

Advantage of square photoshop brushes

Broadly thinking, there is no tool put forward without a genuine reason. Every tool comes with a mission to accomplish; we expect to achieve something after using them. This law applies similarly to these square brushes in Photoshop editing services.

They are important and intentionally included in the tools to handle some tasks. There are multiple reasons as to why you need these brushes under this article. Therefore, below are some of the obvious reasons as to why these square brushes are advantageous. Remember, these advantages are general, and they explain the exact reasons you need to download these brushes on your Adobe photoshop.

They are useful in creating great square tools; a square brush tool is useful for helping you develop a powerful square tool, which is difficult for a typical designer who uses other tools. Who doesn’t like to be unique? We are all unique in different ways, and it is the wish of every photo designers to come up with unique images.

Use square brushes to draw pixel charts, and this is an important term that I can describe to you. Discovering such art is amazing as you can easily generate pixel arts at the comfort of your desk. Experts will tell you how challenging it is to use other tools to create pixel arts.

On the other hand, the tiny square dots help you generate giant pixel arts eventually. This is another reason why many photo editors fell in love with a square brush tool in photoshop. These photo editors are widely using the tools for designing different objects or square objects that they will eventually become a square object.

These square brushes are also useful for drawing certain patterns. A little clue on how to create square brushes can help you develop multiple designs and patterns. Besides, these brushes will help you leave the images with professional outlooks, making them much better than before. Doing does not only sell your name but also portrays your skills concerning photo editing services.

How to make square brushes

Now that you know what a square brush and what some of its advantages, let’s now look at how we can create square brushes in Adobe photoshop. Remember, you will get the square brush tool automatically when you install Photoshop software. The most exciting fact about these brushes is that you will have to search for your favorite by default; the shape looks resembles a circle.

Below is a complete guide on how you can make square brushes in Photoshop. It is simple, and you only need time and an updated Adobe Photoshop; you are ready to go. Let’s get started.

Step 1: Selecting the brush tool

This step is simple because it only involves getting the right brush tool from your menu bar. Clearly, have a look at the toolbar menu and then choose your favorite brush tool.

Step 2: Opening the selected brush tool

Don’t worry about this step because it is also straightforward. Now that you have your brush tool, the next step will be to right-click to open it. You will see something like a round-shaped brush tool plethora.

There is no much about this step because it only involves opening the selected brush tool.

A brush list will appear; please click on the arrow button at the right corner. You will experience the magic as broad-brush options will appear.

Step 3: Choose the square brush option

You will only reach the brushes by scrolling down the menu. You will find the square brush option at the bottom. Get it from here.

Step by step guide on how to How to make square brushes

It is simple to make a square brush the way you wish. Now that you know how to generate it let’s the following detailed procedure.

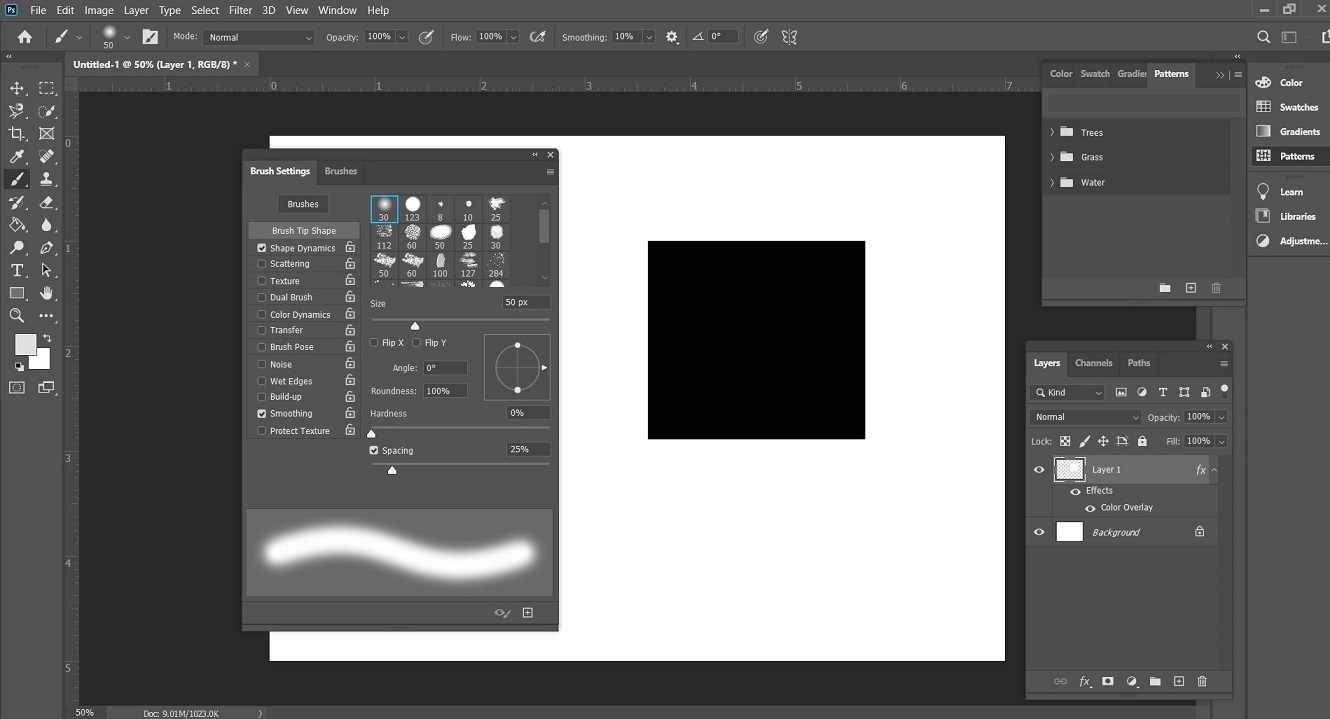
Step #1: opening an open window

Open a new window in your Photoshop software and select the “rectangular marquee tool.”

Step #2: Create a blank section

Under this step, you should try to come up with a blank section. It is simple as you can do so by pressing the shift button and drag it.

Step #3: Making them look black

For professionalism, you must ensure they are black. The process involves pressing (SHIFT+DELETE). It will automatically convert to black.

Step #4: Finding the edit option

This step involves nothing less than finding out where the edit option is. After doing so, you will have a “Define new brush preset” option. Clicking the option will allow you to establish your square brush

That’s all about it. Strictly follow the above procedure to make a square brush within Photoshop.

Top 5 square brushes in photoshop

There are several square brushes in photoshop that helps you generate clear and professional images. This section will only equip you with the top five square brushes in photoshop. They include;

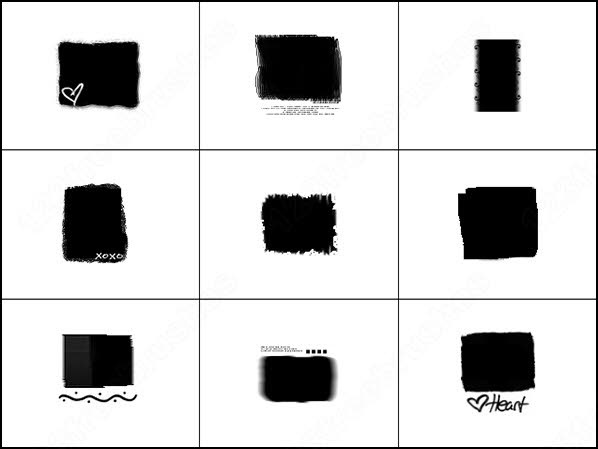
Decorative Square Frames Brushes

Million photo editors widely use this square brush in the world to generate digital photos. These decorative brushes are suitable for highlighting design or their portion. You will fall in love with these frame brushes as they are attractive. More so, you can use these brushes to enrich your projects with a substantial ethnic flavour.

Southwest border Brush

Downloading this latest southwest border brush will make you feel like touring Arizona or New Mexico. With this brush, you automatically get not less than ten varying southwest border brushes together with five pattern files. You will enjoy a Native American ethnic feel from the patterns. Remember, what you only need is to download an updated version to benefit from such services.

Geometric Pattern Pack 1

Here is another newest square brush in photoshop that is also necessary for your daily photo retouching services. This package comes with star patterns, shape and line patterns, and circle patterns. These different geometric pattern packs are essential, and you can apply them on various projects. Remember, you can download them from sites like Vecteezy.

Geometric Pattern Pack 2

The fourth square brush looks like the third option with an almost similar purpose. This geometric pattern pack two features six different latest geometric patterns. You will fall in love with these brushes because they are seamless and come with tile style. Take your images to the next level using this technique and attract many customers.

Colourful square patterns

The last brush option is the colourful square pattern in a six photoshop seamless set that you can use on backgrounds and wallpapers. These square brushes are free for both commercial and personal use. They are the best to enhance the background the way you wish, giving an image a suitable and attractive background.

Conclusion

Hopefully, this article equips you with all information you might need to know concerning “What is a square photoshop brush, and how to make it?” From the above article, we can agree that making a square brush is simple if you are have updated Adobe photoshop software. This tutorial is the simplest as you can generate square brushes within seconds.

How to Get Rid of Double Chin in Photoshop

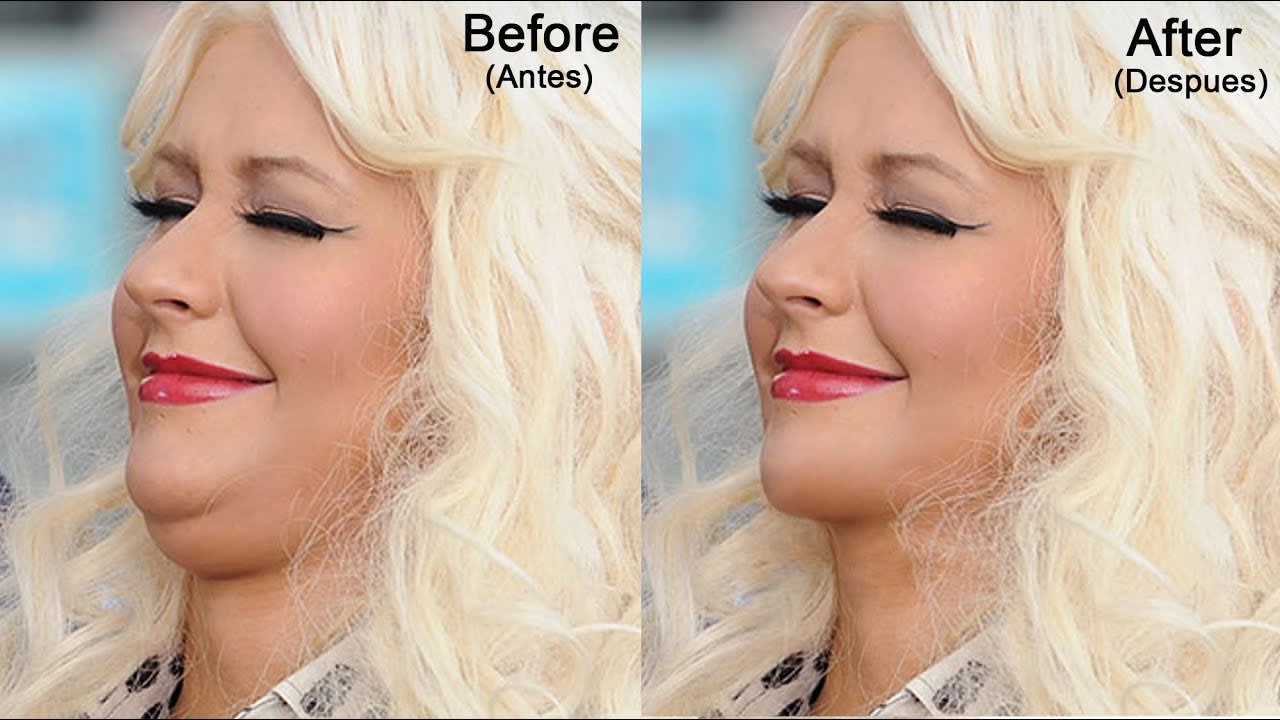
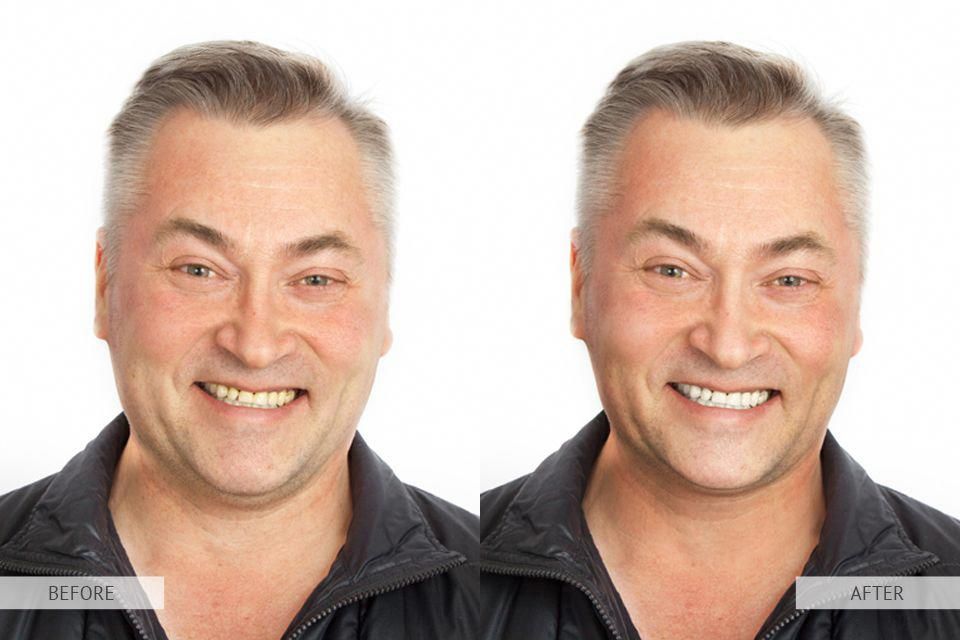
We love taking casual and professional photos in our day to day lives. They are ideal for application in digital photo albums and job portfolios. At FixiPixi, we assist many people to take these photos on a regular basis. Unfortunately, sometimes we can take the images using an incorrect angle that results in a double chin. Not only does this misrepresent us, but it also destroys the appeal of your photo. If this happens to you, we’ve got good news! You can remove double chin in Adobe Photoshop using the Liquify and Forward Warp Tools. Here is how to go about this!

Steps to take for how to remove double chin in photoshop

Open the photo

Begin by launching the software and loading your photo. On your computer, activate Photoshop, point to ‘File’ and click on ‘Open’ to reveal your file system. Select your photo of choice and activate it in your workspace.

Duplicate the layer

With the photoactive in the Photoshop workspace, could you make a copy of its layer? Doing this makes it so that any changes that you make will not affect the original image. For this purpose, right-click on the layer and then tap on the ‘Duplicate Layer.’ To make sure that you’ve done it correctly, strive to create two duplicate layers of your image. Taking this step does not affect your original image in any way but simply protects its integrity during the editing process.

Activate the Liquify suite

The first tool to use for fixing your double chin is the Liquify suite. Head to the toolbar above your Photoshop workspace and click on ‘Filter.’ Proceed to pick ‘Liquify.’ You can also click Shift + Ctrl + X in Windows OS or Shift + Cmd + X in the Mac OS.

Pick the Forward Warp Tool

Activating the Liquify suite presents you with a collection of tools, the Forward Warp Tool. With this tool, you can adjust the numerous characteristics of facial features. As such, it is ideal for removing a double chin from your photo.

Calibrate the Forward Warp Tool

For the best appearance, after removing the double chin, it is advisable to calibrate the Forward Warp Tool. You will need to adjust some variable elements within the tool. Some examples of these elements include Size, Pressure, Density, and Rate. Whenever you change these elements, the effect will be revealed in your image. As such, play with them until you are satisfied with the operation of the Forward Warp Tool.

Implement the Forward Warp Tool

After completing the calibration process, your mouse pointer will be transformed into a Forward Warp Tool. Apply it to the image by clicking and dragging over the affected area. Feel free to be as expressive as possible until you have a firm understanding of how the tool operates. Remember to keep it subtle so that you do not end up exaggerating the effect of the Forward Warp Tool.

Create a new layer

After applying the Forward Warp Tool, it is necessary to apply some noise to the image to have some texture. For this purpose, you need to add an extra layer. Identify the layers window and click on the icon that is second from the right at the bottom. You can use some keyboard shortcuts to the same effect where Shift + Ctrl + N is applicable in Windows OS, while Shift + Cmd + N is functional in the Mac OS.

Head to the ‘Edit menu’ and then select the ‘Fill’ option. A new window containing some setting options will pop up immediately. Set the Contents to be 50% Gray, Mode to be Normal, and the Opacity to be 100%.

Add noise to the photo.

After completing the setup of your new layer, it is time to add the noise. Head to the ‘Filter’ tab option and then navigate to ‘Noise’ and then ‘Add Noise.’ A new window will emerge where you can set the ideal level of noise. Pick a suitable percentage depending on the size of your photo. Play around with the options, but in most cases, 4% will do perfectly.

Blur the noise

After adding some noise to the photo, it can end up becoming a little overwhelming. Thankfully, you can blur the layer where you have inserted the noise. While the effect will still be present, it will not be harsh.

To do this, navigate to the menu bar above your workspace and select the ‘Filter’ option. After that, point to ‘Blur’ and then ‘Gaussian Blur.’ Doing so will activate a new window where you can set the radius of your blurring activity. Again, consider the size of your image while setting this radius. Remember that the larger the radius, the more blurry your image will become. After selecting this, set the blend mode to ‘Linear Light,’ and the noise will immediately mimic the texture you desire on your photo.

Create a Clipping Mask

In the currently active layer, right-click in it and select ‘Create Clipping Mask.’

Create some shadows

You have already edited out the double chin by this point, but there are some additional settings that you still need to perform to add realism to the image. The best way to do this is by adding shadows.

You can select the fourth icon from the bottom of your layers window and then pick Curves to create a Curve Adjustment Layer. Through this layer, you will develop a version of your photo that is darker to mimic shadows. Remember to add a Layer Mask to help you select the areas that will be darker than the rest in this layer.

Intensify your highlights

After editing the shadows, you can now edit your photo’s highlights to create a balance between color tones, with the final objective being a highly realistic image. To this effect, pick a brush tool and implement it along a curve that makes your image lighter. Use it strategically and sparingly to achieve your desired effect.

Conclusion

You can remove a double chin from your image using a wide array of tools in the Photoshop suite. By implementing facilities such as the Liquify, Forward Warp Tool, and the Curve Adjustment Layer, you can remove the double chin and restore your face’s authentic, natural appearance. At FixiPixi, we can help you to accomplish this. In case you would like a rapid, professional, and accurate double chin removal, contact us today!

How to Create a Transparent Background in Photoshop

Photo retouching service

Creating a transparent background for your product pictures in Photoshop is essential. It opens up a diverse range of attractive display options across the web. For instance, a transparent picture background allows you to place your image against a setting that changes colors. Your logo files also need a transparent backdrop to fit in your site, no matter the page color.

To make a photo background clear using Photoshop, you will have to familiarize yourself with the necessary steps. The whole process tends to be easier if you have the right tools and grips of what you are doing. Here is a step by step guide on how to create a transparent picture background.

Useful Steps for Creating a Transparent Background in Photoshop

Before you can make your image background clear in Photoshop, you have to delete the existing backdrop in the first place. There are different steps you need to follow for the best results. Below is an ultimate rundown of the simple steps for softening your image background.

Shoe photo clipping path

Choose the Right Photoshop Selection Device

Creating a transparent image background involves deleting what is unnecessary and selecting what you aim to keep. For that reason, it is crucial to familiarize yourself with several selection tools, depending on your image. Here are some helpful and time-saving tools to consider for this kind of task.

Magic Wand

Magic Wand will select the suitable pixel of a photo – the standard color. For instance, take a scenario where you have a picture with a white setting. All you need to do is click on the white region to select it and then strike the delete button to remove the background. However, if you have multiple sections of the image you want to clear, it is advisable to repeat the process.

Select Object Tool

The select object device uses artificial aptitude to highlight the boundaries of your image. In this case, sketch an outline to show which object to cut and Photoshop A.I. will handle the rest. You can also use this tool to remove a picture from its current selection.

Elliptical and Rectangular Marquee

Here comes another useful section tool, the elliptical and rectangular marquee. The device works best if you want to select a section of your picture with a perfect circle or rectangle. It is not a tricky one. All you have to do is place your selection over what to keep, refine it, and save.

The Select Subject, Mask, and Lasso Tool

You can relate, not every time you will deal with simple selections. Sometimes you will come across complex image backgrounds. In such cases, use the Lasso, Mask, and Select Subject devices as they bear the main enchanting power of Photoshop.

Select Subject

Get an easy background removal start using your Photoshop Select Subject tool. Go to select, and then choose your subject. In a few seconds, Photoshop will highlight the subject of the image using its artificial intelligence. The tool may fail to be perfect with your first try. But do not worry. You can always refine your collection in the next step.

If your image has multiple subjects, only choose one using the Select Subject tool. You will find the device in the toolbox, tucked with the Magic Wand tool. Go ahead. Draw a box all around the object you need, and Photoshop will select it for you. If it doesn’t get it right, refine the selection as you go on.

The complex objects may not come out perfectly, but you can still refine the selection. For subjects with well-defined edges, use the magnetic Lasso. In case the pictures have less defined texture, ends, or irregular shapes, go for the Select and Mask device for the best results. If your image has both, use the two methods.

Take note. Zoom all the possible angles of your object before going to the next step. Cross-check your selection and make sure you don’t miss out on any part of the image. In case you do, reopen your Select and Mask device, then select the area.

Make Your Selection a Layer

To set the images as a layer file, open your Photoshop, open the picture in it and make sure it is in JPG format. Next, you need to find the layers panel in Photoshop, which should be on your image window’s right-hand side. If you cannot find it, click on the window option on top of your Photoshop page. And then scroll down up to the layers section in the menu bar.

On hitting the layer button, you will see the background layer in the layer section. Click on it twice to pop up a new dialog box, give it a random name, and don’t change it as you proceed. The title will take layer 0 by default. Save it and click the okay button. To this end, the background layer is open, ready to delete anything from the image.

Refine Further With Lasso Tools

Even though you did a bit of refining using the Select and Mask tools, the magnet Lasso can refine further. Lasso tends to be faster, especially for images with well-defined ends. So, continue refining your photo for better results.

Select the Magnetic Lasso (which is the third) from the top of the default toolbox. If your photo features both straight and well-defined edges, consider the polygonal lasso tool. It is a better choice for such cases, but it won’t work if your picture has curves.

You can also refine your object by clicking around the outside edge to select any extra background areas you need to cut. The Lasso tool will snap the image ends, but you ought to help by clicking frequently enough. Once the background selection is complete, go for the delete button.

Delete Your Background

Now that you got the subject selection and refining out of your way delete the background. In this step, you need to search for the inverse by clicking CTRL+SHIFT+I. Go to the Select panel to access this option by navigating down the menu bar.

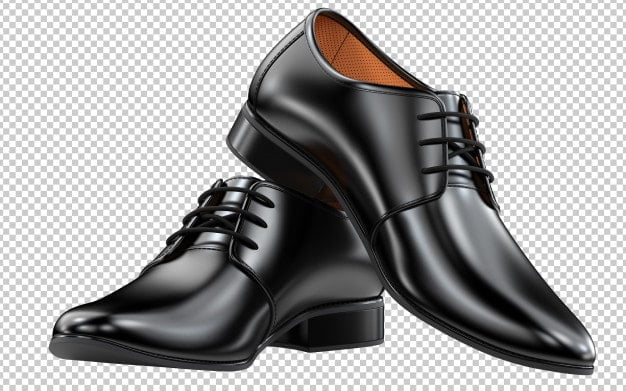
If you are through with selecting the backdrop inverse, hit the BACKSPACE. You will create a transparent background. At this point, your image will appear with a white and gray board, resembling a chess pattern.

Format Your Photo

Now that you have transparent image background, verify its set-up. As the Photoshop Editor, you need to make sure your object is in the appropriate format. In this way, it will be easier to use the picture on e-commerce products websites.

The best format to use when creating a transparent backdrop in Photoshop is PNG-24. It provides transparency even with multiple layers. Moreover, it won’t create a pixelated “halo” in a background with a different color. You can also use the PNG-8 or the GIF older formats of a transparent backdrop. Both can also add an excellent halo effect to your picture.

To save your image in PNG-24 format using the keyboard, press SHIFT+ALT+CTRL and W. You can also open the Photoshop file option and then navigate to Export or Export As. If you cannot see the Export As option in your application, find Save for Web.

After that, choose the PNG-24 from the Preset menu. The Preset is on your right-hand side of the chatbox. You will see a file with an option to select the PNG format. There is a clarity choice, so strike the button. Besides, be careful when dealing with 8-bit files as their file conversions must use PNG-8 form.

Verify the Image Size

Once the format setting is complete, it is also essential to check the size of your image for the sake of websites. Small size pictures are the most suitable on the internet, whereas big size photos reduce your website loading speed. Therefore, you should minimize the size of your images to 200KB or even less.

For you to attain the desired size, go to the dialog box on your right-hand side. You will see the option “Image Size” to regulate the image size volume. If the photo depth is immense, then your file is oversize, and if the image volume is less, then the file is small. For the best results, maintain a minimum ratio. After all, you do not want to upload blurred pictures. So focus on the size of your image and always try your best to keep balance.

Save Your Folder as PNG

It is the last step to take when creating a transparent background in Photoshop. On the dialog toolbox, you will find an option to select your folder. Hit the button and save your file as PNG.

You can now place the picture into a PowerPoint presentation, a website, or a word document. The image will stand alone with a transparent but not white background.

In Summary

In a nutshell, that is the procedure for creating a transparent background in Photoshop. Why don’t you take great advantage of the above steps to make your images more dazzling and attractive? You can delete any white backdrop, provided that you have the necessary tools and understand how they work.