Fixipixi

How to Fix Grainy Photos Without Photoshop

Fix Grainy Photos Without Photoshop-min

Graininess in a photo can completely ruin its appeal. The grainy appearance eliminates the detail of your image and prevents the colors and textures from appearing clearly. As such, it is essential to remove graininess from your photos whenever it emerges. What exactly causes graininess in your photos? It can be caused by bad lighting during the photography session. It can also be caused by a camera lens that has low capability. Thankfully, we can remove graininess from your photos in the post-processing phase of professional photography. Here is how to remove graininess from photos without photoshop.

What exactly is grain, and how does it end up in your photos?

At FixiPixi, our photography experts confirm that grain is another noise word. You may be taking photos in locations where the light is of medium or low amount. In such situations, the sensor on your camera can automatically intervene to increase your photos’ amount of light. Whenever this occurs, a grain emerges in the resultant photo. It impedes the Clarity of your pictures and prevents viewers from enjoying the detail of your images. Here are the reasons for the grain in your photos.
how to Fix Grainy Photos Without Photoshop

An ISO setting that is too high

If you set a very high ISO on your camera when taking photos, it increases the chances of grain emerging in your photos. A rule of thumb in photography is that the higher the ISO, the higher the grain cases appearing. Adjusting the ISO helps us to improve the Clarity of images when taking photos in low lighting. Unfortunately, when the ISO is too high, it increases the risk of grain in the resultant photos.

Low lighting in your photos

Light is a very important factor when taking photographs. For this reason, photographers employ sophisticated lighting equipment in their photoshoots. Whenever the light is not sufficient enough, the photos are negatively affected by grain.

The type of camera being used to take the photos

Cameras come in many shapes, sizes, and budget levels. The most affordable cameras are considered low-budget. While they can take good photos, the resultant images are highly likely to have negative characteristics such as grain. The low-quality lenses and shutter controls result in unnecessary light flooding your images. On the other hand, high-budget cameras employ sophisticated mechanisms to control lighting and grant you perfect pictures.

When the sensor is too small

Every camera has a CMOS sensor that can be large or small. Also known as the CCD sensor, it may be too small to help take perfect images. Devices such as smartphones and SLR cameras contain small CMOS sensors that take grainy photos. To avoid this, it is necessary to take photos using a large CMOS sensor because it has millions of light-sensitive sections that accurately capture and record image data, resulting in grain-free photos.

Here is how to fix grainy photos without Photoshop

Can you fix grainy photos without having to use professional software such as Photoshop? Yes, you can! We can accomplish this for you at FixiPixi by using alternative, newbie-friendly digital tools to fix grainy photos. An outstanding example of such a tool is PhotoWorks.

PhotoWorks is a great software that you can use to fix grainy photos because it does not require you to interact with complicated settings to get the job done. Here is how you can use it to fix your grainy photos.

  1. Begin by installing PhotoWorks in your computer system
  2. Launch the software and load your grainy photo using a simple drag and drop method
  3. Navigate to the ‘Tools tab’ and tap on it to activate the ‘Noise Reduction menu.’ Select this menu, and you will get the required Panel.
  4. Upon activating this menu, PhotoWorks will automatically zoom into a section of your grainy photo so that you can see the effect as you proceed through the editing process.
  5. Identify the ‘Amount slider’ and drag it back and forth to smooth your image. PhotoWorks will automatically remove the grains from your photo.
  6. After removing the grain to your satisfaction, the image will be a little bit blurry.
  7. Navigate to the ‘Enhancement tab’ and change the ‘Clarity settings’ by dragging sliders back and forth
  8. After achieving a desirable level of Clarity, save your image.

In just a few steps, PhotoWorks helps you to fix grainy photos without photoshop. It is particularly user-friendly because each correction step simply requires a click and drag process. We can use this software to retouch images or resize them for you!

How can you avoid grainy photos during a photography session?

We have found that preventing the emergence of grain in your photos is better and easier than fixing them later. Find a suitable ISO level that fits your photography session. Adjust the ISO level according to your specific photography session. Low levels of ISO, such as 200 or 300, normally result in the lowest grain levels, while high levels of 3200 and beyond usually produce high amounts of grain. Make an effort to keep the ISO as close to 100 as possible.

Sometimes, you may find yourself in a low light situation where an ISO level of 100 is not going to be enough. If you find yourself here, adjust the aperture and then the shutter speed to 1/60 without a tripod to automatically result in a low ISO. You can also use special photography lights such as strobes or flash units to increase ambient light. Also, set your camera to calculate the areas with low levels of light so that it does not over-extend your image to the dark areas. These strategies will help you to avoid grain in your photos.

Conclusion

Grain ruins the quality of your photos to a large degree. It prevents important details from being visible and masks the richness of colors in the image. We have explained how to fix grainy photos without photoshop above for you. Since prevention is better than cure, we have also demonstrated how to prevent the emergence of grain in the first place. Follow our guidelines to get clear photos every time!
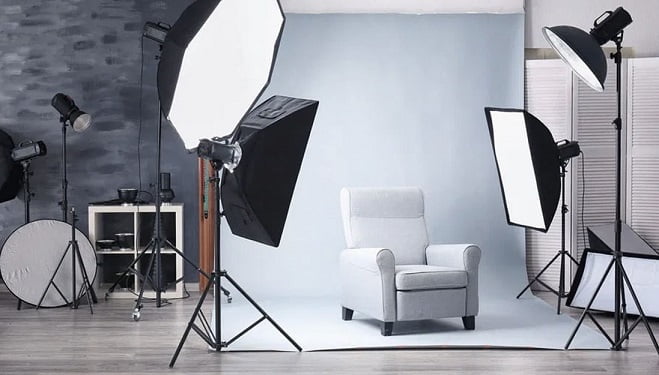
Furniture Photography Idea and Photo Editing Tips

furniture photography

Are you still looking for apt furniture photographs for your eCommerce business without a catch? Well, it’s time to make your furniture products stand out and outshine your competitors. Furniture photography plays an essential role in providing quality, presentable, and eye-catchy pictures for an online business.

Furniture-Product-Photography-Tips

Moreover, taking photos of your piece of furniture is not enough. In other words, it requires a professional image editing service for better results. Perhaps you have no idea where to begin, and that’s where this article comes in. It features essential furniture photography ideas and photo editing tips you need to make your furniture photos outstanding. So, let’s get started.

Furniture Photography Ideas

We all wish to get correctly captured photos of furniture pieces, right? If you want to make that possible, you’ll have to create a list of professional ideas to help you out. It comprises primary preparation, the necessary photography gear, researching other things. The opinions are as follows:

Do Proper Research:-

The first and crucial thing to do is researching the market and your competitors’ abilities. By doing so, you will understand and create an ideal way or means for promoting your products. Besides, it helps you identify a niche, spot out your target market, and know their demands. More importantly, it will help you find the best way to capture your furniture products for your customers and generally increase sales.

Choose an ample space to work from:-

It is critical to identify a suitable space from which you will capture the images of the furniture. Some people would prefer a photo studio while others create an area for the shooting. Regardless of the place you choose, ensure it has a relatively large space for adequate room for capturing the photos. If you are dealing with small pieces of furniture, select a perfect area for the task.

furniture photography

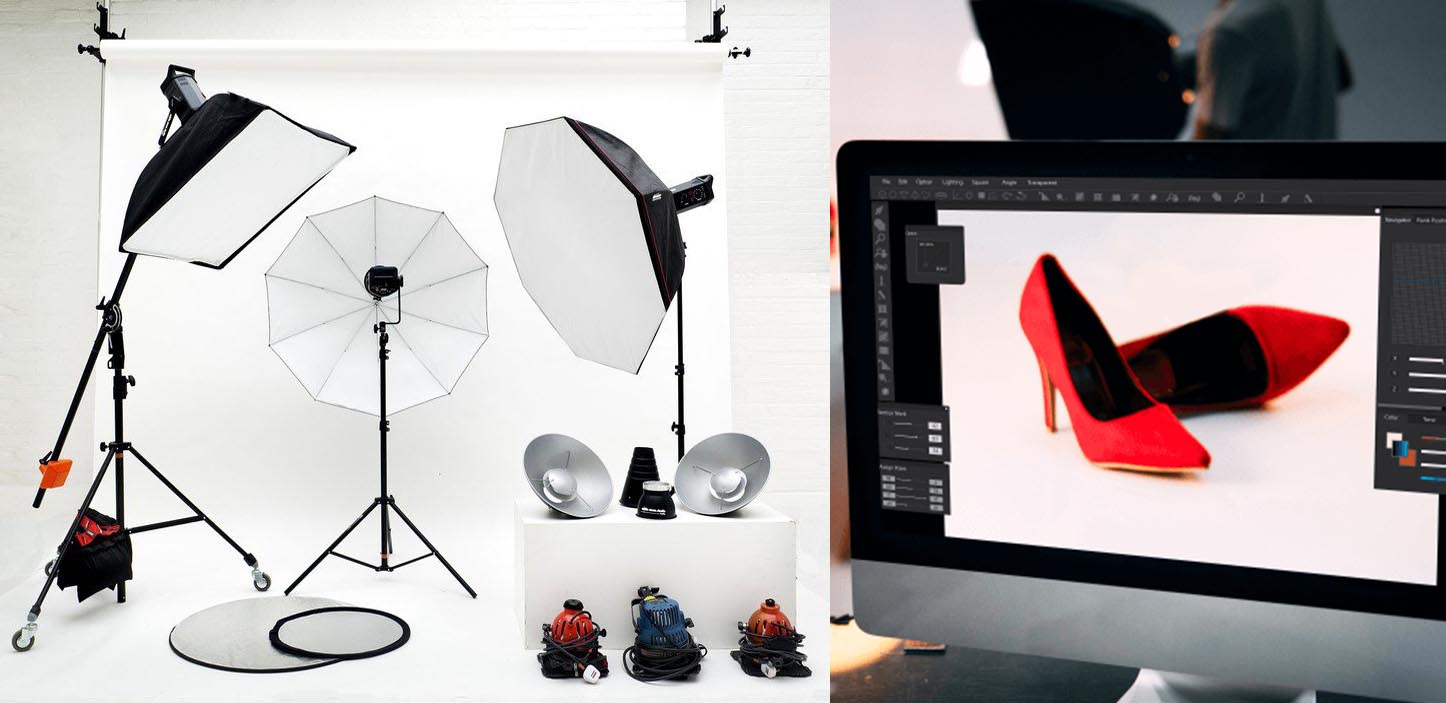
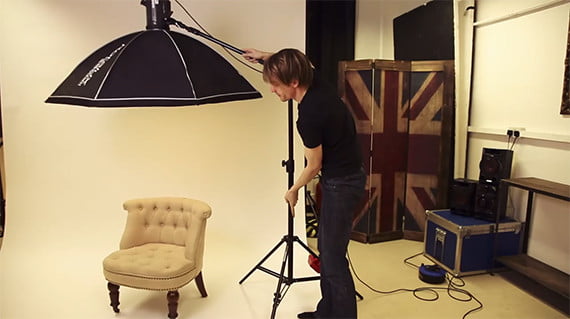
Furthermore, be sure your set studio has enough light for the visibility and clarity of the photos. Natural light is often the best buddy for photography but always avoid direct sunlight. In case the light intensity is low, or it’s getting dark, use artificial lighting materials such as softbox lights, backdrops, umbrella lights, and others. This will help enhance the amount of light for a better impact on the entire shooting process.

Get your furniture ready:

Before starting any photo-shoots, be sure your furniture products are indeed ready. Now, how do you make this happen? The first thing to do is eliminate any forms of scratches, dust, or stains from the furniture you want to take photos. Besides that, repair and remove any flaws that may affect the look of the furniture in photos. You can polish and avail them for photography.

Avail all the photography gear:-

The next thing is to assemble all the items and tools you’ll need for the image capturing process. This involves getting the right camera, tripod stand, lighting, lenses, and other necessary accessories. Be sure that the tripod stands you select is sturdy enough to give you a steady hands-free shooting. The best part is, it allows you to optimize the camera settings for top-notch shoots.

Use the right camera lenses:-

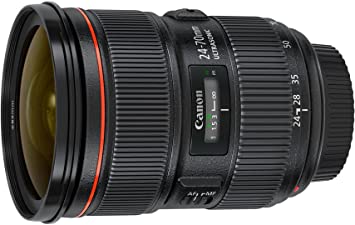
If you want to get furniture photos with incredible quality, you need to choose the best camera lens. You can use the internet to search for the quality camera lens suitable for the task.

Canon EF 24-70mm f2.8L II USM Standard Zoom Lens

Typically, the right camera lens for furniture photography should range from 30mm to 70mm. Such a lens guarantees you less image distortion hence great photos.

Adopt several shooting angles:-

When taking a product photo, it’s essential to capture them from multiple angles. This way, you won’t miss any vital part or feature of the furniture. Plenty of professional photographers agree that this approach is the best for obtaining better captions. As a result, you can decide what angle is best for your product photo.

Make captions with objects or people:

Another best way to promote your online furniture business is by making the photos look real. In other words, capture pictures of your piece of furniture showing people and other subjects sitting atop. They make the captions look impressive and outstanding. At the same time, your audience can easily visualize how the product will fit their needs.

Professional Photo Editing Tips

Editing your furniture images is a must-do task that finalizes the photography process. If done poorly, even the most outstanding photos get damaged. That’s not the thing you’ll want. Some people may seek for professional image editing services from other companies or individuals. Others prefer to do the editing process by themselves. The following editing tips or services are mandatory for your furniture product photos.

  • Background removal

Are you want to make your furniture very impressive to your potential buyers? If yes, you’ll need the background removal service. It is a standard service that gives your images a unique setting and professional touch that catches the buyer’s attention. The good thing is, it helps enhance and focus the look of your furniture.

  • Adjust brightness and contrast

Here, you’ll need to give your furniture in the photos a proper contrast and brightness. As a result, this technique ensures that the customers get the furniture’s exact appearance and make them feel comfortable.

  • Increase the image’s resolution

Usually, the resolution of an image defines its quality. In this case, increasing the resolution helps to give the furniture a luxurious and professional look desired by many buyers. It’s the best way to transform a picture with low resolution to one with high-resolution. Therefore, it enhances the quality and overall look of the furniture photo, which attracts potential buyers.

  • Give the furniture image a 3D appearance

Giving a product a three-dimensional look is the currently trending best way of making the image outstanding. It’s unique and provides plenty of attention to your furniture. In this case, a 3D model service provider will help achieve this great look.

  • Photo resizing

Another tricky secret of product photography is to present your images using the same size. However, be sure not to compromise quality when doing so. Professional editors have the best tools that help in changing the image’s size without any distortion.

Overall

To this end, that’s all we have on furniture ideas and photo editing tips for taking your photography skills to the next level. They are simple to understand and will enable you to make your website look unique. Undoubtedly, they will help you increase your customer base and boost sales at large—best of luck putting the ideas and tips in play.

How to Take Pictures of Clothes to Sell Online

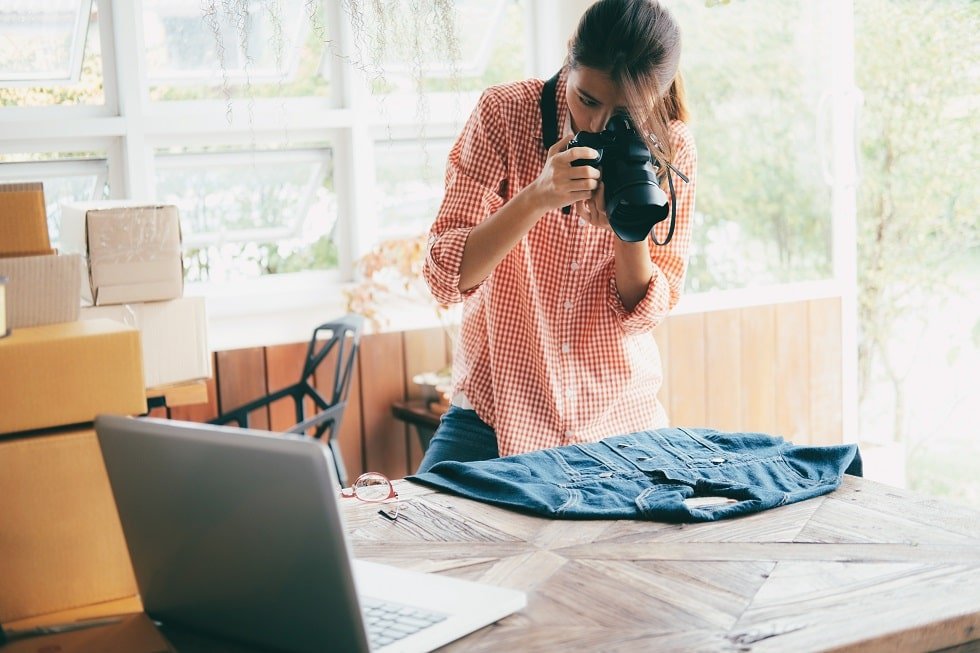
Launching an online store is always a great idea because you can reach more clients than traditional brick and mortar establishment. At FixiPixi, we can help you to take pictures of clothes to sell professionally. Apparel photography must be done in a specific way that delivers clear product representation. We have a service about product photo editing service for you.

However, we also have some tips on how to take pictures of clothes to sell on your own. Read on to discover how you can accomplish this.

Take Pictures of Clothes to Sell Online

Begin by Preparing Your Clothing Properly:-

When you’re taking photos of your clothes to sell online, they must look perfect. They should be smooth, supple, and present the ideal texture. Unfortunately, the reality of life is that your garments are likely to be worn or creased due to transportation rigors. As such, it is important to prepare the clothes properly before you take photos of them for your online store.

Examine the appearance of your garment carefully from top to bottom on the inside and the outside. Check if there are any tags, labels, or identification items that need to be removed or concealed. Repair any damage by sewing the clothing and eliminating distractions using a lint roller to eliminate strings if the garment is creased or wrinkled, iron or steams it for a smooth appearance.

Create a studio for your garment photoshoot-

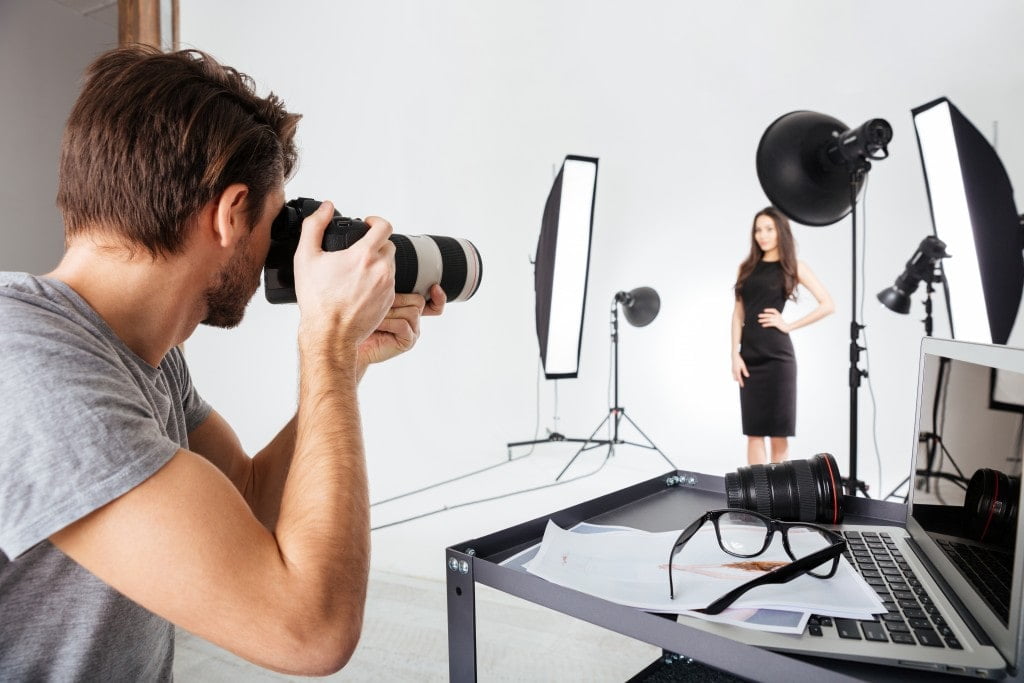
With a creative mind and some handy items, you can easily transform any room that contains ample space in your home into a photography studio. You can accomplish this using a tripod, camera, duct tape, seamless white paper, and natural light for those operating on a low budget. If you have some additional money to spend, you can construct an ideal studio for your garments by adding a C-stand, moonlight stand, and a mannequin.

Pick a white or light grey backdrop:-

As you take pictures of your garments, it is important to make sure they are easy to view. To this effect, use a white or light grey backdrop. Visit your local photography store so that you can get cheap and effective seamless rolls of white or light grey paper.

best product photography in Italy

Use your C-stand to hold up the seamless paper. Clear and clean the floor underneath your studio so that the seamless paper can curve downward naturally in such a way that it eliminates any shadows and prevents creasing. Remember to fasten it to the ground using tape.

A C-stand helps you experience additional flexibility in your background positioning, giving you ample room to move around your studio. If your budget does not allow for this, you can simply tape the seamless paper to the ceiling or the wall. After setting up the backdrop, place your garment in the middle section on its own or a dummy. Make sure that it is right in front of your camera. As you take your shots, make sure to capture the colors as accurately as you can.

Use a high quality camera:-

As would be expected, your camera is a very important part of garment photography. You should use a DSLR camera that can take photos of up to 50 Megapixels. The camera should also have a manually-adjustable aperture and exposure settings. If you do not have access to a DSLR camera, you can use a high-quality smartphone to take the your product picture. We will share

Implement a tripod:-

While taking your garment photos, you need to use a tripod to eliminate any shakiness in the image. In addition to that, a tripod makes sure that your photos are consistent and frees up your hands to perform other tasks. Perch your camera firmly upon the tripod and place both such that they face the garment directly. During the whole photoshoot procedure, you will not move the camera and tripod. You’ll only need to change the garments.

Ensure correct, ample lighting:-

While taking photos of your garments, you should ensure ample light flowing into the studio. Natural window light is a cheap way to get great lighting for your garment photoshoot. A large window facing the East or the West should be enough for your shoot. However, it is always advisable to use an artificial lighting kit for this purpose. Good personal equipment can be made up of a light head, C-stand, softbox, pocket wizard and battery pack.

In this kit, the light head is the illuminator itself. For this purpose, you can use a mono-strobe lighthead. The softbox diffuses the light and captures your product under even rays of light that are appealing. You can use the C-stand to hold up the light head as well as the softbox around it. The pocket wizard synchronizes your camera and the light head, thus creating a secondary flash. Last but not least, the battery pack powers your camera or lightheaded if and when required.

Style your garment upon the mannequin:-

The best way to reflect your garment’s fit and appearance is by styling it on a mannequin. It presents the garment in an ideal shape and helps the shoppers to visualize themselves wearing it. A mannequin is an affordable and easy prop to work with when taking photos of clothes to sell. Feel free to tuck and pin the garment upon the mannequin until it fits perfectly.

Shoot:-

With the garment set on a mannequin directly in front of your camera, press halfway down on the shutter release button so that your camera can focus. After that, take the shot. As you proceed, change the settings of your camera, such as keeping the ISO between 600 and 640, aperture higher than f/11, and white balance to AUTO.

Conclusion

We take professional photos of garments for our clients at FixiPixi. After many years of providing the ghost mannequin service, we understand the correct way to take pictures of clothes to sell. Follow our guide above to achieve this objective. In case you need some professional assistance, contact us!

How to Depixelate an Image in Photoshop and Lightroom

How to Depixelate an Image in Photoshop and Lightroom

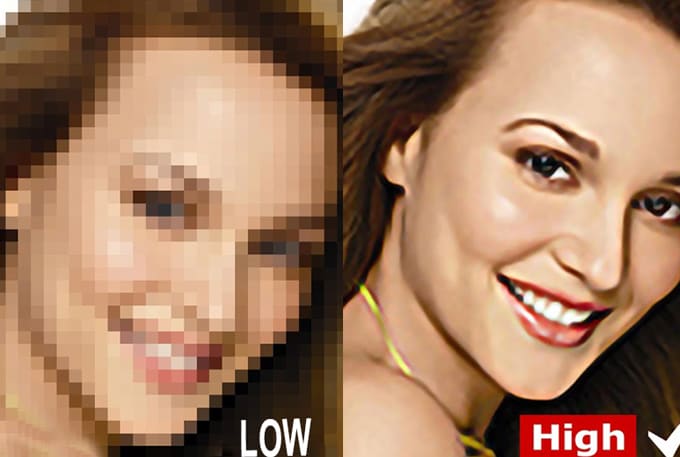
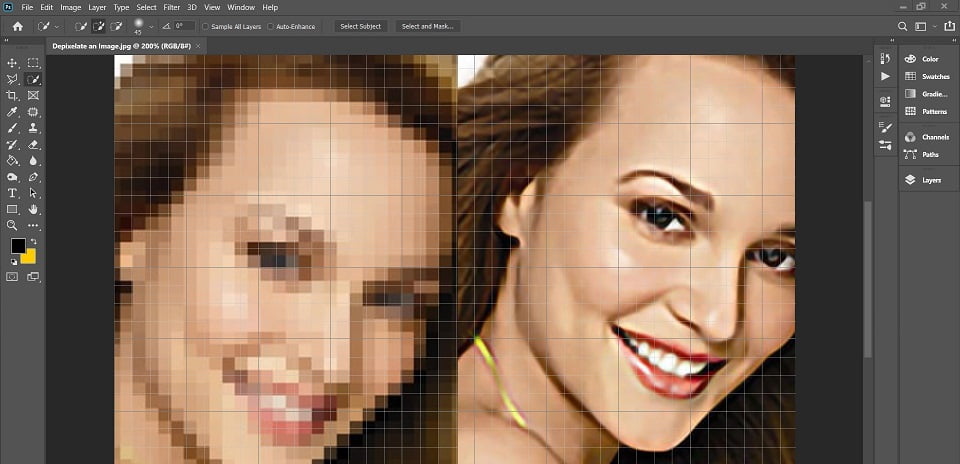
Pixilation is a common flaw affecting many photographers. It is often associated with low image resolution, which may be due to lower camera resolution. As a result, this condition damages the quality of even the most precious photos. Such images aren’t worth for use as either personal or professional purposes.

Does this happen to your images? Well, you can revive or rather depixelate your photos into high-resolution pictures by yourself with the utmost ease. Most importantly, you’ll need a competent photo editing tool to make the entire process effective. For instance, you can use Adobe Photoshop, Adobe Lightroom separately or combine.

However, pixelated images typically have low resolutions, which implies that they have fewer image details. Therefore, it is impossible to retrieve all the content for a stunning photo without applying some enhancements. You can get rid of the issues created by pixilation and still obtain a decent looking and smooth image.

If you don’t know where to start, worry no more! This article explains the proper ways on how to depixelate an image in Adobe Photoshop and Lightroom.

Method 1: Depixelate an image using Adobe Photoshop

Adobe Photoshop is among the best and most efficient image editing tools used around the globe. It is your ultimate choice if you intend to get quality images with high resolution from pixelated photos. The best part is, it is super easy and straightforward to use. This means that you can do it yourself without a fuss. Are you ready to create clear looking images with increased quality and resolution? If yes, then follow the following steps.

Depixelate an image using Adobe Photoshop

Step 1

The first thing to do is to open the depixelated image in Photoshop. After that, navigate to the image menu located at the top bar of this editing tool. Then select the image size option to check the photo’s resolution and then go to the next step.

Step 2

While still on the photo size window, you will see a pop-up box and click on the constraint proportions. Then, increase your pixilated image’s resolution to about 300 pixels, both the width and height. Also, set the resample option to automatic and click on the OK button. This step aims to increase the picture’s size for better depixelation. If you are through, move onto the next procedure.

Step 3

Once you have increased the image size, go to the camera raw filter first. Click on the detail tab and try to adjust the following factors to suit your photo’s needs.

For noise reduction, change:

  • Luminance to 65
  • Luminance detail to 0
  • Luminous contrast to 0
  • Color to 100
  • Color detail to 0
  • Color smoothness to 100

As for image sharpening parameters, set:

  • Amount to 100
  • Radius to 1.5
  • Detail to 10
  • Masking to 0

What if these settings don’t work aptly with your photo? Try to modify the values as you look at your image to find a suitable and satisfying outcome. By doing so, you’ll be good to go to the next step.

Step 4

After using the color noise reduction filter, the image will lose some amount of saturation. This will force you to fix it by going to the Image menu. Then the adjustments and choose hue or saturation window. Adjust the image’s saturation to about 6 and then click OK.

Step 5

Here, go to the layer palette and right-click on the image layer. A dropdown list will pop-up. Navigate through to find the “convert to smart objects” option and click on it.

Step 6

On your Photoshop’s interface, click on the filter and then on the sharpen option from the pop-up dropdown. Besides, select the un-sharp mask option or try out other options to get the perfect settings for your image.

That said, these steps are straightforward to follow. If you carefully observe and put them into practice, nothing will stop you from changing a pixilated image to one with high resolution.

Method 2: Depixelate an image using Photoshop High Pass Filter

The chances of getting a blurred photo after doing all the sharpening are pretty high. And this means all your efforts of depixelating the image are for nothing. Thankfully, Photoshop High Pass Filter is a blessing image editing tool you need to make things clearer. Are you wondering how to can you use it? Well, we have curated a step by step guide to help you out. Without further ado, let’s start right away!

Step 1

The obvious first thing to do is to open your image in Photoshop. Then, increase the picture’s resolution to 300 pixels, which automatically makes the image larger.

Step 2

After that, duplicate the photo layer and keep the image selected. Next, click on the Filter option located at the Top Option bar and select the High Pass Filter. By doing so, the photo’s layer gets a gray appearance. Do you see that? If yes, you are right to move to the next step.

Step 3

In this step, change the layer’s mode to overlay blending mode, which makes the image clearer. Turn off the eye-icon to make the layer invisible and feel the change.

Step 4

Once you finish the above step, it is time to make some adjustments to the photo. Go to the adjustment layer then pick the level option. Then, adjust the slider to make the picture relatively darker, which removes the glare. As a result, the final image you get is apparent with high resolution.

It’s as simple as that! The resulting photo is flawless and with excellent quality for your personal or commercial use.

Method 3: Depixelate an image using Adobe Lightroom

Do you want to make the details on your pixilated image sharp and crystal clear? If so, the adobe Lightroom is all you need. To make that happen, follow the following simple steps.

Step 1: Choose the pixelated image to edit

Firstly, click on the Develop module on your Lightroom Classic interface. Check for the filmstrip located at the lower part of your window and then choose an image to edit. In case there’s no filmstrip, click on the small triangle at the lower part of your screen. After picking a photo to edit, move to the next step.

Step 2: Click to open the Detail section.

You should see the detail panel on your workspace’s right side. If not, click on the detail option to open it. Then, use the setting options that pop-up in the panel to sharpen and clear the image details. That’s not all!

Step 3: Modify the sharpening settings.

Still, on the detail panel, find the section for sharpening the image. This section will find several other options that will help you make the details in the image sharper. For instance, the amount slider defines the amount of definition your image has. By adjusting it, your photo gets a crisp and sharp look. You can move it until you find the right amount of sharpness that suits your image.

Besides, you may see two other settings for the image’s sharpness.

  • The radius – this tells how large the photo’s details are while you make them sharper. If the image has plenty of small pieces, use a smaller radius for an excellent outcome. On the other side, a large radius will work correctly with photos with more extensive details like those of people.
  • Detail setting – this setting focuses on the number of emphases the image’s edges have. A higher detail value indicates the photo’s texture, whereas a lower cost gets rid of blurriness.

Have you found the image sharpness you desire? Well, you’re good to go to the next step.

Step 4: Review the changes made

Once you finish adjusting the sharpness, it’s time to check out how sharpening has affected your image. On the left side of your workspace, find the 1:1 option in the navigator panel. This setting enlarges the image view to 100%.

Look out for the view options bar below your photograph to see the before and after image view. After that, click and drag within the photo to compare the original picture and the sharpened one.

If you want to return to the regular view option, click on the FIT option in the navigator panel and press the D button on your keyboard. This will take you back to a single photo view. That said, your photo is now ready for printing, sharing online, or use for other purposes.

Method 4: Depixelate an image using both Photoshop and Lightroom

You must be curious if you’re using this technique for the first time. But it’s not a big deal. The best thing is that using both of the most fantastic image editing tools from Adobe is highly beneficial. In other words, it saves you time, troubles, and efforts of using each tool separately.

You can also resize or sharpen your images with ultimate ease and still retain the photo’s quality. The entire process is easy. You have to follow the steps below. Let’s start!

Step 1

Firstly, click to open your pixilated image with low resolution in Photoshop. Click on the top bar’s image option to open a dropdown list and select the image to resize option. Are you there? If yes, let’s move to the next step.

Step 2

Secondly, change the image’s resolution to about 300 pixels. You should notice that your photo’s size has increased. The size should be good enough to work on the image for perfect results. To go to the next step, press the OK button.

Step 3

With the above steps, your Photoshop task is complete, and now it’s time to open the image in Lightroom. Typically, this editing software will help you convert the low-resolution image to high resolution and better quality.

Step 4

After opening the image in Lightroom:

  1. Select the Basic option on the right side of your screen. You will see a pop-up list of settings.
  2. So, adjust each of the settings until you find an excellent fit as per your photo’s needs.
  3. If you have finished making the modifications, move to the next step.

Step 5

Now, click on the Detail option and then adjust the amount slider to sharpen your photo. In this step, the most critical tool to use is the Luminous that helps in Noise reduction. Next, move the Detail slider and contrast to fix the blurriness in your image. Once you finish changing all the settings as per your photo needs, you can now smile at your clear and crisp new image.

That’s all you need to do to depixelate an image using Photoshop and Lightroom image editing tools. So, we hope you are now confident enough to share your edited photo on social media, print, or use for eCommerce and other activities of your choice.

Overall

The above are our best four ways of changing photos with low quality to images with high quality and resolution. Besides, they will help you fix any blurriness, pixelated images and give you high-quality photos you can be proud to use for any task. The biggest pro is, you can do it yourself, whether it is at home or the photo studio.

You can choose the appropriate way to use, depending on your desires. In case you find any challenges, feel free to ask for help from a professional or research more. Best of luck in your image quality transformation process!

Top 5 Best Product Photography Agency in Italy

best product photography in Italy

Product photography is essential in the advertisement and eCommerce industry. High-quality images help to boost your business. They entail the product’s features that will help you achieve your desired goals by buying them.

In Italy, product photography has gone the extra mile as compared to other places. Many product photographers who have specialized in the industry and their work are of high-quality and attract customers’ attention.

Choosing the best out of the many photographers isn’t easy. In this article, we have highlighted the top 5 best product photography agency in Italy.

Need Product Photo Retouching Service? Request for free trails.

IKU.Agency

IKU Agency

IKU is a top creative agency in the photography industry for more than ten years. They have a young and experienced photographer specializing in content production, product development, marketing, communication, and strategic and operative consulting.

Over the years, the agency has collaborated with the best designers, professionals, and artists within Italian and international to develop creative work. Other than their high-quality work, IKU provides flexible support to their clients and work hard to meet their expectations.

Etimaging.net

This agency was founded by Emanuele, one of the top Italian commercial product photographers whose works have exemplary. His high-level skills in shooting, retouching, and lighting make it possible to provide quality to the product photo and attract customers’ attention.

Emanuele gently handles products, makes the photo fun and enjoyable, keeps the clients informed about the features and what the product can do, and finally meets its needs.

Every business has the vision and goal that it requires to achieve, and Emanuele understands that, and therefore he maintains the brand’s consistency and creative idea that is achievable. His studio provides a professional and comfortable environment that is ideal for product photographer in Italy.

TonettiPhoto.com

TonettiPhoto

TonettiPhoto is a top photography studio located in Milano, founded by Marco Tonetti, an international award Italian photographer who works worldwide. The Milano based studio is well known for commercial photography, wedding photography, and premier portrait photography.

With their experience, Tonetti has been able to work with both local business owners and independent brands and enterprises in shooting quality product image, editorial, and commercial campaigns.

They are equipped with a modern, high-quality camera that can shoot quality images that meet your clients’ needs.

Fabionapoli.com

Fabionapoli.com

Fabio Napoli is another Milan based photographer whose work is of high quality. His father inspired Fabio to the photography industry, who taught him various techniques. He later began a small photographic studio in Salerno before he advanced his skills in London.

It is from his study in London that Fabio specialized in advertising photography and fashion. His deep passion for art has enabled him to capture more engaging and high-quality images.

In Italy, Fabio has been regarded as one of the top product photographers, making it impossible to be possible with the quality of the images he shoots.

Martingarciaperez.com

martin garcia perez

Martin is a professional photographer with more than 20 years. His long experience has enabled him to meet great photographers and collaborate with others for high-quality products. Due to this experience, Martin has worked with both public institutions and companies.

Besides product photography, martin specializes in hotel photographer, interior design and decorations, advertising, and museum work photography. Much of his work has been published in various catalogs, books, and magazines.

He has been famous in Italy due to his high-quality product photography that draws the attention of customers.

How to Choose the Best Photographer

Product photos have a significant impact on any business. The product image identifies a particular company, and it makes it more distinctive to their clients. Over recent years most companies have embarked on product photography as their marketing strategy.

To achieve this, they need to find the best professional photographer. To get one isn’t that easy; this is because there are some factors you need to consider.

Research well on the photographer

Always do your research on what it takes to be a good photographer. Before making the final decision, research the photographer’s credentials and experience you are about to hire. Select that photographer with a fantastic reputation and skills.

Technical Proficiency

No matter how the best the camera or lens and other photographic technology are, if the photographer doesn’t know how to use them well, his work can’t be attractive.

Modern photographic devices have a variety of features and options, and therefore the photographer must be able to use them well for high-quality work.

Photographer Capability

Always learn to know what is your photographer can do and to what extent. To understand this, go through their portfolio because you will find some of their past photographic work. Check their image quality, style, and lighting.

Experience

The experience of a photographer is vital when choosing the best photographer. It’s a plus to go for those photographers that have been in the field for many years. This is because they are knowledgeable and have gained skills that make their work of high quality.

Photographer reputation

It’s good to learn the reputation of the photographer that you are about to hire. To know this, check on the reviews of the photographer online. How are the previous clients talking about him?

What is the quality of their work? Always learn to read reviews from trusted sources. Go with that with the best online reviews.

Budget

Photographers have different rates on the services they offer. New photographers will always prefer to have low rates to attract more clients.

In this case, consider your budget and choose the best one based on the price. But remember to consider the other factors for you to get quality work.

Conclusion

Product photography is one of the areas that requires the photographer to be creative and skilled to come up with high-quality work. In Italy, there are so many product photography agencies that provide the service. If you are interested in product photography then you can also learn at your home.

However, it is not all agencies that can help you meet your advertising and online business. The five agencies we have discussed have emerged to be on top of the list due to their high-quality work and experience.

By choosing the best photographer, you are assured of quality work. By considering the factors, we have highlighted, you are assured of the best outcome.

Top 10 Best Product Photographer in USA

Product Photographer in USA

Product features are essential to customers as they differentiate one product from the other that performs the same purpose. In eCommerce, the product photo is the first thing that draws the attention of customers.

The right image that is professionally photographed will lead to more sales of the product.  Most business owners in the USA prefer increasing their sales and generating more earnings.

They also prefer choosing the best product photographers who will take high-quality photos of their products. There are so many product photographers in the USA who specializes in product photographs. Below are the top 10 product photographers in the USA.

Best Product Photographer in the USA

Photographer in USA

  1. Tim Tadder

Tim Tadder is one of the top photographers in the USA who has specialized in advertising photography. He is well known for capturing stunning images of various concepts like actions, sports, and people. Tim is based in southern California.

His commercial and editorial photography work on the product has enabled him to work with various popular brands like Pepsi, Coke Zero, Budweiser Miller Lite, and McDonald’s Adidas, among other famous brands. He has always worked with popular brands that require attractive and stunning photos of their product.

  1. Harold Ross

Harold Ross is a Philadelphia-based creative fine art photographer. Harold uses a unique technique referred to as light painting in creating amazing and attractive product images. He works in a dark room studio and begins to paint light on the subject after opening his camera.

His unique and creative work has enabled him to work with famous brands, both locally and internationally. His work has been featured in favorite international magazines like LensWork and photo china magazine.

  1. Peter Belanger

Peter Belanger is another advertising and editorial photographer whose works are unique. He does not only love photographing donuts but also other gadgets and technological devices.

His passion for photographing people and various products has enabled him to work with famous brands known as apple, Johnson & Johnson, and Sony. He has also been shooting for Dwell and Macworld magazine.

  1. Timothy Hogan

Hogan is a top and award-winning commercial product photographer specializing in various beauty industry products and other sectors. The significant products he works with re jewelry, watches, cars, clothing, cosmetics, accessories, fragrances, and other products.

His work is based in California, but his services are also available in other places like New York, Los Angeles, and London. He works with internationally famous luxury brands and Dubai advertising agencies in various industries like design, fashion, beauty, and beverage.

  1. Lucas Zarebinski

Lucas is a New York-based leading product photographer who has worked with various top companies worldwide. He is well known for creating conceptual photos of high quality, which helps solve clients’ problems.

His work is genuinely full of fine art that has been creatively created. Some of his major clients are Sony, Walrus, Pepsico, IBM, Target, and other great companies.

  1. Fernando Decillis

Fernando Decillis is an Atlanta-based photographer who specializes in documentary and advertising product projects. His passion for photography began when he was a teenager. His experience and quality have enabled him to work with various top celebrities, and companies like him have worked in campaigns with Coca-Cola, Wild Turkey Bourbon, Reebok, and others.

In 2015 he won the award-winning photography, and he has won a good number of awards due to his quality work in product photography.

  1. Kremer Johnson

This product photographer consists of two great individuals that are Cory Johnson and Neil Kremer. They are professional product advertising photography, and they are based in Los Angeles. They specialize in creating top-notch advertising images, editorial, narrative, and other images.

Their long experience has led to their work being featured in several magazines, museums, and campaigns. They have also worked with both big and small advertising industries. Their images create a stunning relationship between the product and the features and therefore attract more customers.

  1. Rob Grimm

Rob began his journey of photography when he was eight years. He used to use to document the family trips; something led him to venture into product photography. His principal product photography is based on beverages, food, and various impressive products and attracts its attention.

His experience and high-quality work have enabled him to work with great brands like Grey Goose, Cabo Wabo, Skyy Vodka, Miller Coor, Kraft Foods, among other great companies and clients.

  1. Alex Koloskov

Alex is not only a professional product photographer but also the co-founder of Photigy.com and the instructor. He is one of the top self-made product photographers whose work is of high quality compared to some commercial photographers.

Alex is an innovative product photographer who doesn’t borrow from others but instead uses technology to create a product image that is unique and impressive to customers. His high-quality work has led him to work with jewelry companies, beauty, and other great companies.

  1. Ransom & Mitchell

Ransom and Mitchell are two creative, professional, and talented product photographers and designers. Their work tries to create a stunning environment that seems not to exist. The high-detailed work and narrative create you to enjoy the image as you try to learn the stories it exhibits.

Their work has been featured in various places like New York, San Francisco, Tokyo, and others. Their creative artistic career in photography has made them do things that seem impossible to be practical.

  1. Sam Kaplan

This is one of the top photographers that is obsessed with the product photography version. His obsession has enabled him to take photography in an approach that is unique to that of others do. His artistic work is based on shape and visualization form that makes viewers think more about the product.

His shooing experience attracted several clients who need his services. Some of them are Nissan, the New York Times, Field and Stream Men’sMen’s Fitness, Fast Companies, and others.

Conclusion

Product photography is essential in describing vital information about the product, service, or idea and marketing it. The image used is critical in communicating with people instead of using language. Also, you will need to choose the perfect photo retouching service to attract your customers.

In the USA, several top-notch product photographers can deliver high-quality work. Choosing the best among them isn’t that easy. In this article, I have highlighted the top ten great product photographers in the USA. They will work hard to help you achieve your goal and attract more customers.

Adobe Photoshop CC 2019 (x64 bit) Direct Download Links

Adobe Photoshop CC 2019 (x64 bit) Direct Download Links

Do you like editing your images? What do you know about the Adobe Photoshop CC editing app? Adobe Photoshop CC is a top photo editing app that uses innovative technology to assist graphic designers and photographers in their work. The software has been undergoing various updates, and one of them is Adobe Photoshop CC 2019.

Description of Adobe Photoshop CC 2019

Adobe Photoshop CC 2019 was launched late in 2018 for faster graphics processing. Photoshop is used to create photo editor art like retouching, collage, color correction, the transformation of graphics, and others.

Photoshop CC is the world’s top best graphic style and imaging for the computer to produce and enhance photos, 3D design, and illustrations. The software uses high tech features to improve editing activities. Some of the exciting features include

Features of Adobe Photoshop CC

Enhanced content-Aware fill tool

This is one of the standard features that many users use despite not being the best in creativity. It is powered by Sensei, an artificial intelligence technology that has been improved in this update.  The modern standalone workplace allows you to achieve high editing experience for quality results.

Adobe Photoshop CC 2019

The Content-Aware features a full-resolution preview generator, and it can save the changes and lead to the new layer on your layer panel. There is also a range of controls within the window display, like showing a sampling area that helps you know the image you are editing.

Live Blend Mode preview

This is one of the features that welcome the update onto the creative software. Photoshop CC 2019 allows you to instantly preview the blending modes as you hover the drop-down menu at the top of the layer panel.

The feature helps beginners to get used to it and on how to use the software. It also allows much faster workflow in editing as it lends them with experience.

Masking made easy

Masking the images with frames has been made easy with this adobe version.  It features frame            Tool (K) that quickly creates a circular or rectangle frame that acts as a placeholder on the image. The tool is also able to change any bespoke shape or the text into images.

Color wheel

The absence of a color wheel on the previous adobe version had been an area of concern among some users. However, Adobe Photoshop CC 2019 has included the features, and it works just like the classic color wheels and enables them to get what they require on their images.

Simple and Improved interface

Adobe Photoshop CC 2019 has improved its interface to match the font size to that of the app control and connect users. It revamps common vital commands like the New Undo (command-Z), Step Backward command, and key combo.

Motion blurs filters

The version features a blur feature that you can use to add blur along with the path and blur effect rotation in creating an elliptical or circular blur. It has a mercury Playback Engine that enables you to use all the blur filters you need and in a fast way.

Typekit Desktop Fonts

There is a Typekit library where you can select your desired font, synchronize them with the desktop computer, and work with them from the menu in Photoshop.  The Adobe Photoshop CC 2019 automatically replaces the missing fonts in the document.

Advanced 3D Printing

The advanced technology enables you to see where and how the Photoshop fixed 3D grids make it easy to adjust the third-party 3D modeling app. It also features accurate preview displays that ensure you have precise visualization of the model before Printing.

The other key features of Adobe Photoshop CC 2019

  • Symmetry mode
  • Excellent Export that as experience.
  • Power to the applicator
  • UI size preference
  • Access to the lightroom images
  • Designed for anyone to use

Download Now (64bit)

Benefits of Adobe Photoshop CC 2019

Improved Layer composition

Adobe Photoshop CC 2019 software version saves time on working because it has a single display to apply all the composition changes.  It also enables you to view the attributes of each layer composition and swift between the layer compositions.

Advanced content editing technology

The new version has implemented a content-based fill tool, content-based patch, and content-based movement tools to mix the areas with gradient fill. This allows you to achieve realistic and organic results in the editing of images.

Quick and efficient guides

With this Adobe Photoshop version, there is no need to align several objects with an exact distance from one another within the workplace. With the version, the distance between the objects can be viewed in pixels to accurately placement the content.

Improved workflows

The improved application feature allows you to increase the usability and speed in carrying out various editing tasks. It also enables you to access the advanced color panel and a list of used brushes. They are used in synchronizing the setting of the working environment and keyboard shortcuts.

The improved mercury graphics engine

The use of mercury graphics engines helps to improve the operational performance of OpenCL. The feature is used to process the new blur filters and create a mask of focus areas in a fast and quick way.

How to install Adobe Photoshop CC 2019

To install adobe cc, 2019 is easy; you need to follow the following steps

  • Down load the full software from the official website
  • Once the download is complete, extract the software and run the setup
  • Use the given crack as you disconnect it from the internet
  • Open the software and enjoy the features

Minimum requirement

  • The processor must be of Intel core two or MD Athlon 64 processor of processor speed 2GHz
  • A RAM of 2 GB and above
  • The operating system; Windows 10*, Microsoft Windows 7 that has service Pack 1
  • The hard disk of space 3.1 GB or more, there is additional space required during the installation
  • A monitor with good resolution of 1024 x 768 displays and above
  • Graphics processor acceleration of 2.0 and above which is capable of the system

How good is Photoshop CC 2019?

Adobe Photoshop CC 2019 provides you with robust image editing services as the new features create an efficient workplace on the software. The feature like blend mode comes in handy form for the production view of the edited images. It allows you to carry out various tasks quickly and efficiently.

Bottom line

With Adobe Photoshop CC 2019, you will have the entire feature you need for creative photo editing services. Having it is just like investing in top-notch software with new features. If you are a photo enthusiast, designer, advanced amateur, or pro photographer, you need to give a try to it.

How Much RAM Do You Need for Photo Editing?

How much RAM Do You Need for Photo Editing

In this era, tons of photographers use photo editing software for many reasons. It aids in modifying the photo to look at perfection using their desired devices. However, the most disturbing question most of them tend to ask is, how much RAM is ideal for Photoshop.

Genuinely, answering this question is quite tricky even for the most experienced editors. Because there are plenty of considerations, you need to have in mind. Luckily, this article is here to answer the amount of RAM you need for editing your images.

How much RAM a Photoshop Need

How Much RAM a Typical System Need to Operate Stably?

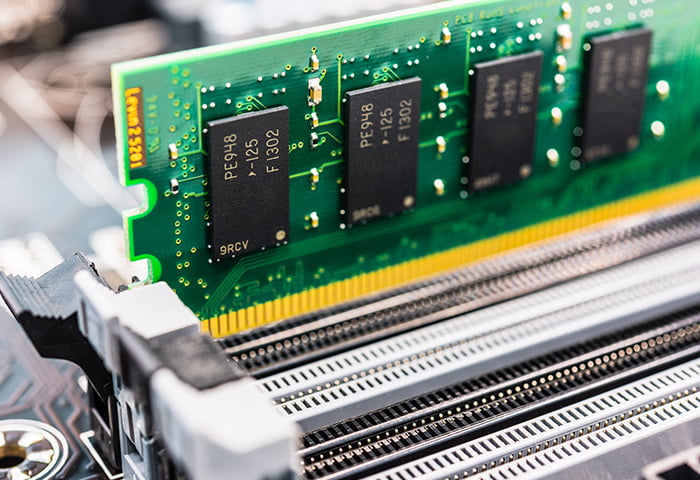
Windows 10 is an average computer for a photo editor. It has an Email Software, Chrome browser with tabs, and a Window’s photo-viewer. Generally, a photo editor’s computer needs at least 4-6GB to run well and support other programs.

How Much RAM a Photoshop Need

In this case, you may need to understand how much space the photo editor currently has. This determines how much you will use for the editing process. Often, a Photoshop software itself needs 262MBs of RAM. This is without opening or uploading any photos to the software. However, when a 5MB JPG 12MP 8bpc photo gets opened, the RAM usage rises to 369MBs. What’s the reason for the increase?

Image Compression

The reason is, the software expands any compressed photo files for easy editing.

Like the GIF and PNG files, the JPG exists as a packed down image file type. So, the software uses algorithms to reduce the file size. This happens without sacrificing its visible quality. If the image file gets so much compressed, the quality may get lost.

Why does the photo editing software decompress an image file? The main reason is, the photo manipulations work on a pixel format. It compresses the image file after each pixel alteration tends to be very sluggish. Plus, it strains the CPU.

Bit Depth

This is another way of determining how much RAM you need for editing your decompressed image. In most cases, photo editors manipulate their images in three channels; R, G, and B are commonly known as RGB. Interestingly, each channel can save up to eight bytes or 256 various values per color. In other words, all JPG images exist in either eight or 24bpp (bits per pixel).

Image Resolution

This is also an essential factor that determines how much RAM you will need to edit your photos. Doing the math is super easy. , take [height in pixels] by [width in pixels] by [Bit Depth] and divide the sum by 8000000.

But why eight million? The reason is, 8 bits is equivalent to one byte while a megabyte has 1000000byte. This calculation helps you to get the decompressed photo size in MBs.

Photoshop Layer

A photo editing software may come with more than one layer. This allows for easy estimation of the quantity of RAM consumption for each photo multiplied by the sum of layers. Besides that, you can know the amount of RAM the uncompressed image is in use. You can find it by looking at the bottom left corner of your Photoshop software. But, the first number implies the absence of layers while the second one accounts for all layers.

RAM Requirement Per Photoshop Layer

Megapixels 8bpc 10bpc 16bpc 32bpc
8 MP 24 MB 30 MB 48 MB 96 MB
12 MP 36 MB 45 MB 72 MB 144 MB
16 MP 48 MB 60 MB 96 MB 192 MB
20 MP 60 MB 75 MB 120 MB 240 MB

Fantastic! From the table above, you can roughly calculate or estimate the amount of RAM one photo may need.

Above all, if you genuinely want to know the amount of RAM you need for editing images, think about the following;

  • The number of photos you should open at the same time
  • What Bit Depth you intend to use for editing photos often 8bpc for JPG files, and 16bpc for Raw files.
  • The average number of layers the photos have
  • How much additional RAM your device needs

Final Words

Using a Windows 10 operating system and Photoshop, 8 to 16GByte will be sufficient for nearly all your image edits. This is ideal when editing JPG photos in the resolution range of 10MP to 20MP and the occasional RAW photo.

Over 16GByte of RAM is best for image editors who edit mostly in high resolution and great Bit Depths. Also, they may have tons of other RAM exhaustive applications working in the background.

How to Choose the Best Photo Retouching Agency

Photo retouching is a crucial service occurring in both portrait and product photography to remove flaws from the image. Accordingly, product photography involves getting rid of dust, textures, and any unwanted wrinkles, while portrait photography consists of eliminating pimples and blemishes from the skin. It is important to note that expert photo retouches use different programs, including Lightroom and Photoshop, to enhance the quality of images. Notably, the digital makeup used in the process of photo retouching helps to improve the skin tone, color, and texture by removing color from hairstyle, shed, lip, and eyebrows, thus gaining the model photo’s attraction.

Advantages of Photo Retouching Company

The responsibility of high-quality images in the current dynamic and competitive marketplaces is essential from the marketing viewpoint of various Agencies. Additionally, the popularity increase of photograph-centric social networks such as Pinterest and Instagram images are significantly becoming a marketing language universally.

Therefore, hiring a photo retouching agency is crucial for business operations due to various reasons. First, the photo retouching agency help to re-energize the portrait and product images using editing techniques to make photos more user-friendly on multiple platforms. The use of photo retouching agency help to make work easier since images are useful for different business operations. The business operations include e-commerce, real estate, and product advertisement services. Therefore, business operators using professional agency get the perfect deals because their properties have high-quality images.

Factors to Consider When Choosing a Photo Retouching Agency.

Choosing the correct retouching agency in making beautiful photographs appear elegant is very difficult since it requires the owner to consider various factors in making the right decision. However, finding an ideal photo retouching agency is enhances the assurances of editing images with the utmost perfection and care. Accordingly, the professional company presents not only premium quality images for the advertisement, but they also show good photos to the audience to attract new customers. Therefore, this article aims to explain how to choose a photo retouching company that can help in manipulating images according to the needs.  Different factors also help marketers to brand and market business products by different kinds of eye-catching photos.

  1. Experience:-

Experience is one of the most critical factors to consider when choosing a professional photo retouching agency. Accordingly, it is a tool possessed by a company or an individual and used to make outstanding images of various products for customer attraction and productive business operations. Most importantly, customers should give photo retouching tasks to companies with past accomplishments prove in the field. Additionally, photo retouching agency has many years of professional training and can make elegant decorations of images representing various products in the advertisement.

Moreover, the agency has a more in-depth knowledge of the photography art and use high- quality retouching software in making business managers stand out from their competition. The photo retouching agency has a better understanding of how to produce expertise-looking business materials needed without conveying to them the details of the materials. Therefore, it is necessary to ask for a list of clients competently worked in the past before hiring the retouching agency to ensure quality provision of services.

  1. Technology and Software.

A better understanding of technology and software usability is essential in the process of photo retouching. Sufficient knowledge in technology enables companies to use film and digital cameras in editing images and adding motion effects to business products from the same camera. Consequently, individuals need to ensure that retouching companies are using the latest technology and software in delivering quality operation services before hiring the agency to avoid low-quality production of images.

Working with the latest software enhances simples applicability of cropping, darkening, lightening, and zooming tools in the process of making high-quality images that can draw the attention of more customers into the business. Similarly, companies with the latest software enhance the sophisticated editing of images, thus producing a perfect and flawless outcome. Therefore, giving image retouching tasks to specialists with the most software features is essential and can make business owners from incurring re-editing expenses.

  1. Budget:-

The cost of hiring a professional agency for the photo retouching process is a significant factor and demands great attention. Business operators should ensure that the retouching process covers various services, including cleaning up backgrounds, removal of small blemishes, and top-end digital manipulation. However, not all companies are perfect retouchers since many of them have an insufficient time of retouching numerous images for the business; hence they opt to outsource the task.

The coast of outsourcing can range between $5 and $75 per photograph depending on the number of retouches required; hence the preproduction process is essential for many individuals since it can cut the production costs. Additionally, it is crucial for individuals to not only make a decision on photo retouching but also provide other services in the list to avoid retouching costs. It is also important to note that the quality of services comes before cost; therefore, each person should be sufficiently careful to prevent falling into fraud service givers.

  1. Multiple Quotes

Selecting the best retouching services to require the customers to understand that hiring the first service agency they come across cannot be the wisest decision. Moreover, the process requires consulting numerous retouching agencies and gather their quotations to enable selecting the best retouching company. Accordingly, multiple companies would allow customers to make comparisons of their photo retouching results and facilitate the selection of the most productive company. Notably, customers should pick on the agency with the highest number of reviews from the previous clients and customers to ensure fast operation and quality production of the images. Therefore, customers must visit the website of the agency to help to view testimonials and reviews of customers to choose the most appropriate company.

Conclusion

A correctly manipulated image can convey the desired information of the product to the target audience. Additionally, the image retouching on the business brands and products can stick in the mind of customers and encourage them to make a purchase. Notably, outsourcing the best company for photo editing services is essential in boosting the business by improving the elegant look of the product and business images. Thus, is crucial for customers to visit our website and learn more tips on how to choose photo retouching agency such as speed, referrals, and internet-based search to avoid falling into the hands of fraudsters and new companies.

Top 7 Best Photo Scanning Services in 2021

BEST PHOTO SCANNING SERVICE

Photo scanning services involve digitalizing old photos. There are several pictures or videos we may have, and we don’t want to lose the memories.  To maintain the photos, we need to pick the best scanning services that can help us archive our old photos and negatives into a digital file. With the high demand for the services, there are several photo scanning services available online. To pick the best is not accessible if you are not familiar with the service. In this article, we have reviewed the best scanning services that are reliable and affordable

Need Digital Photo Scanning Service?

Need High end Digital Photo Restoration Service? Contact us now. We will provide the best photo restoration service as your requirements. 25% discount only for you.

  1. GoPhoto

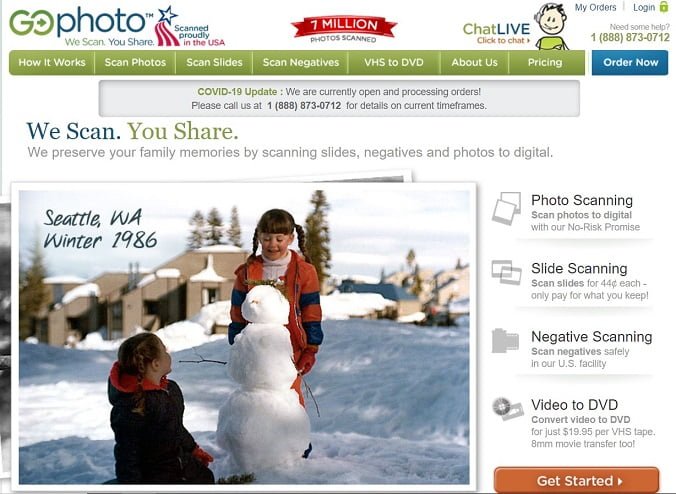
GoPhoto is one of the best photo scanning services among the other services. The service is extremely friendly to the users, and their process is streamlined. Its design is hassle-free to the users. GoPhoto is the best among the others due to 4 main features

The first one is the shipping fee. They have a flat rate shipping fee of $20, even if your kinds of stuff are many. It is an advantage when compared to others. You are to print a UPS label when opening your order, and they will subsidize the fee of the required set.

GoPhoto

Second, it is not a must to structure your file to send it to them. You are free to send even the whole photo albums, and they will remove the photos and scan and replace them as they were. It gives you easy work as opposed to when you are required to arrange your pictures or slides before you send your order.

There is no upfront payment. In most cases, many photo scanning services require one to pay an upfront fee of 50 percent, but with GoPhoto, you pay when you have seen your scanned photo. If there are some scans, you do not need you to delete them and pay only for those you are to keep.

It offers free unlimited online library access. It is an excellent opportunity for one to organize their photos, back up, and share them on social media. It contains some ad-on like rush services, home movie conversion, and extra copy scan. This allows one to carry out any of the services if they need it.

Pros

  • It is user friendly hence easy to use
  • Allows one to pay for only scans they want to keep
  • Offers a free additional online library

Cons

  • Their scan price per each item is somehow higher
  • Negatives and slides scanned at a lower resolution
  1. ScanCafe

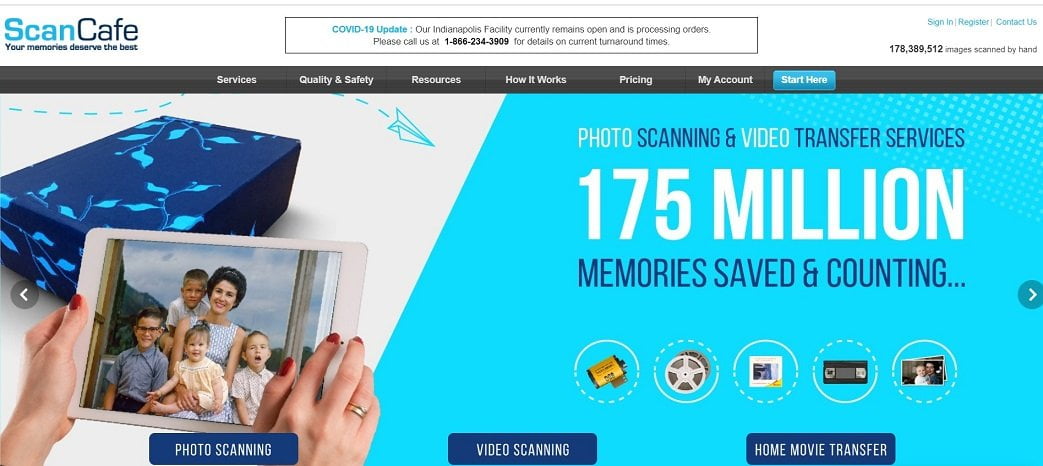
This is another photo scanning service that allows one to scan a variety of home photos, media, videos into digital form.  The value kits with the service make its services stand out. ScanCafe provides a 3000 dpi for scanning the slides and negatives and 600 dpi for printed photo scans.

The services offer an excellent option for sending all the items in one kit rather than sending them out separately as other services do. The size of the package can be as from 500-10000 scans, which are appropriate for shipping and label. The option does not have a rush service option; therefore, it takes time to process the kits.

ScanCafe

This service has a limited customization option, and each scan can get the attention of up to 3 minutes. For bulk kits, one has to repay them, and it should be known that there is no preview option once the scan is done. They also offer the best scan price of 29 cents /photo for up to 500 scans. Once the scan is done, you get your scans and your DVD with the scan. Here is an online gallery that is created specifically for your work. With this, you can easily share them online.

Pros

Cons

  • Customized value kit
  • Scanned files are not sorted in folders.
  1. ScanMyPhotos

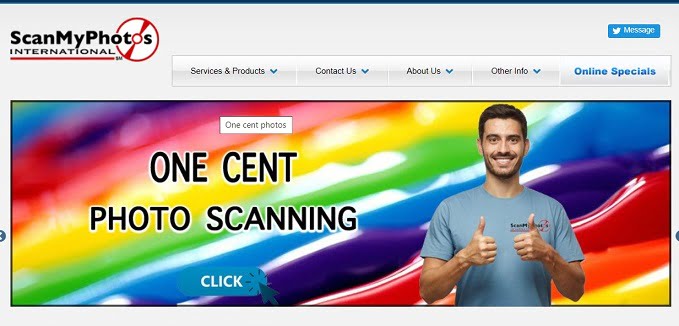
ScanMyPhotos provides the fastest image scanning services when compared to others. If you need your photos to be scanned instantly, these guys offer the best services for you in a short period. For them, they give some turnaround pay-per-scan photos in 7-10 days. Still, they also have a unique one-day scanning selection on various orders such as prepaid boxes that can carry up to 10800 images, for they do not include other media like negatives and slides.

You can have an in-person appointment for the scanning services if you are living in Irvine, California. They accept this for the locals in the area. Even with the super speed scanning, their services do not come with any inconveniences at all. For your photos to be accepted, you need to clean them thoroughly and arrange when you are sending them.  ScanMyPhotos company is stringent when it comes to photos, so your photos must follow their rules to work on them.

ScanMyPhotos

They have an extra option, which is costly when they scan and arrange your order. The company warns that if your images are packed backward, you will get the same scan with backward instead of the front. This is an indication that they do not give more attention to every photo as compared to other services. This might seem to be discouraging.

Pros

  • Fastest services within a single day scan option
  • Has a high-quality photo scan quality
  • Convenient with UI
  • Bulk scans available
  • Instilled with a lot of features

Cons

  • The bulky scan is expensive
  • Has strict guideline in packaging and sending photos
  • Has a limited delivery option
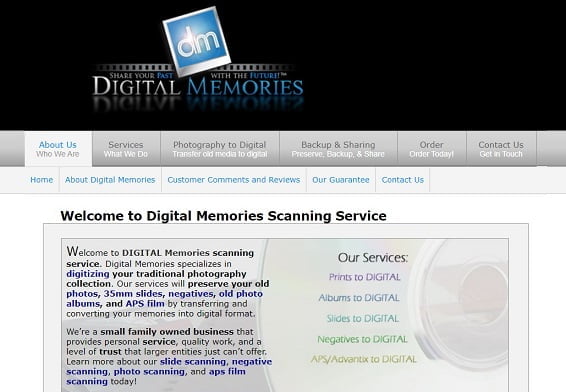
  1. Digital Memories

Digital memories renewed offer the best photo scanner service to those interested in excellent resolution and quick digitization scans. They partner with MiMedia to provide the best other media services, such as cloud service and ensure that your photos are protected from hardware failures. This is one of the best and vital features that most people fail to consider whenever they are doing photo scanning services.

Digital Memories

When scanning photos and films into digital formats, it’s well to maintain it in digital formats because they do not fade or deteriorate quickly. A storage format with digital photos has a short lifespan, let say 4 to 8 years. For physical images, the cases are different, and they can last for more than a century. So to have a concrete backup plan of protecting them is good.

Digital memories give their clients free 60 backup days once they have scanned their photos. The backup can be continued at a few additional amounts. This provides the client with the best time to search for the best backup plans for his digitalized media if they do not want to use cloud backup services. With the MiMedia, it allows their client to back up the whole library of digital photos even when they haven’t scanned them. The service will enable one to stream their videos and share them with any Wi-Fi.

Pros

  • Provides photo backups for scanned photos
  • Has an excellent resolution of scans
  • Offers a backup plan for all the scanned images and videos
  • Fast reversal
  • Gives the best dpi for image scan

Cons

  • The cost is higher compared to other services
  1. Scan digital

ScanDigital services is another one photo service that provide a wide variety of scanning services that clients do prefer. Unlike other services that scan and restore old photo formats and negatives, ScanDigital offers more to convert all films and videos to the required formats. This is the best service for those who have 1950s movies and want to convert them. The service is able to convert the videos and films into BetaMax, MiniDV, Hi8, Digital 8, and VHS to digital formats. It converts the negatives and films also.

They have some service expert technicians who are able to convert old films that might be damaged. The whole scanning process includes well-trained experts who inspect and clean the film during the conversion process. If there is any broken issue with the picture, they will fix and repair films whenever it is required. With these remarkable services they give, their scanning services are a bit expensive. For 600 dpi, it cost 68 cents. There is also another option of 88 cents for 1200 dpi.

The good thing with ScanDigital is that all the scanned photo it must undergo three stages for expert reviews before they sent to their clients. With this, the photo quality is maintained. If a client isn’t satisfied with the final result, rescan ben be done on a fee basis.

  • Pros
  • It is suitable for video digitization
  • All photos go through expert revision before sending it to the client.
  • They allow free photo re-edit if the client isn’t satisfied.
  • Able to digitalize videos

Cons

  • The turnaround is slow
  • Somehow expensive compared to other services
  • Has no backup services to scanned photos
  1. Memories Renewed

If you are looking for a fast digitalization and a service with an excellent resolution in scans, Memories Renewed is the perfect service for you. It gives the ideal photo resolution services that make the company the best. Memories Renewed services allow analogy images, film negatives, and slides, and they skillfully scan them into digital files. One can send all the album to be scanned something that other services doesn’t offer. It is ideal for an all-in-one scan at the lowest cost of 60 cents for each image.

This might seem expensive compared to other services, but the quality of the scan is of high quality. With them, you can have a backup plan of monthly at an affordable price. The money is deducted from the credit card once the customer gets the scans. It should also be understood that the service requires one to pay upfront of up to 50 percent.

Pros

  • Has a decent photo restoration services
  • The turnaround is fast
  • Its dpi for photo scan is best compared to other services
  • Able to transform audio from the cassettes

Cons

  • It is expensive compared to other services.
  1. Dijifi scanning services

Dijifi is known to be one of the most expensive photo scanning services for old photos into digital services. In terms of photo processing, Dijifi is known to be the best among the other scanning services. Their turnaround is invaluable because they are able to convert the old photos that were damaged by time into digital files. The turnaround isn’t fast time.

The Dijifi team boasts some impressive photo retouching skills that make the photo look more pretty than the original ones. With their services, it is not easy to notice any effect of digital manipulation on the photos. The significant setbacks with their services are expensive, and they charge 95 cents as opposed to others, which are cheaper.

Pros

  • Offers a pro-level photo retouching
  • Its turnaround is fast
  • Has the best photo processing

Cons

  • It’s expensive

FAQ

What is the cost of photo scanning services?

Photo scanning services depends on several factors when scanning videos, films, and photos. The photo size, resolution of the digital files, organization, original formats, among others, are some of the factors that determine the cost.

Is can I scan my photos?

You can, and you need to buy a cheap scanner that can cost $40 0r more. However, the process is complicated and tedious if you are not familiar with it. It requires a lot of time and someone who is an expert in some technical issues.

Conclusion

Our photos, negatives, and slides deteriorate with time. This limitation is experienced with analogy files, something that isn’t experienced with a digital file. The use of the hand in scanning can be tedious and may not offer the best digital formats required. With the improvements in technology, various scanning services can help save your old memories.

You need to wisely choose the best scanning service that will meet your expectations. In the article, we have discussed the seven major best photo scanning services. When selecting the best service, pay attention to the media type, resolution, photo restoration that the service is working with. Additionally, the cost of scanning and upfront fee plus the shipping fee should also be put into consideration.

Note:- FixiPixi is a digital photo editing company, we have not provided any print service.